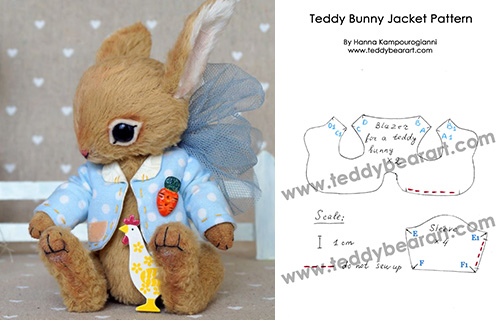
On my website, you can find a lot of teddy bear clothes patterns. Please download a free printable teddy bunny jacket sewing pattern, get the list of materials, and a free tutorial.
In the end, you will find extra tips for making nice decorations and the aged look of a jacket.
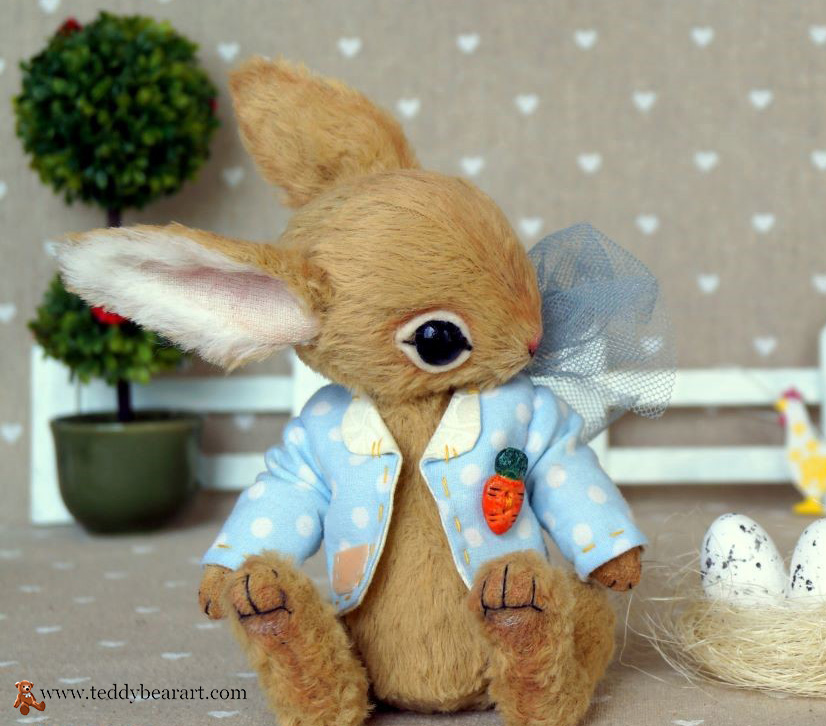
This jacket was designed by me for a teddy bunny 18 cm in height.
Please download a free jointed teddy bunny pattern and get a free pattern tutorial.
As you can see, this jacket is specially designed for the tail. It’s a nice detail that you don’t see often.
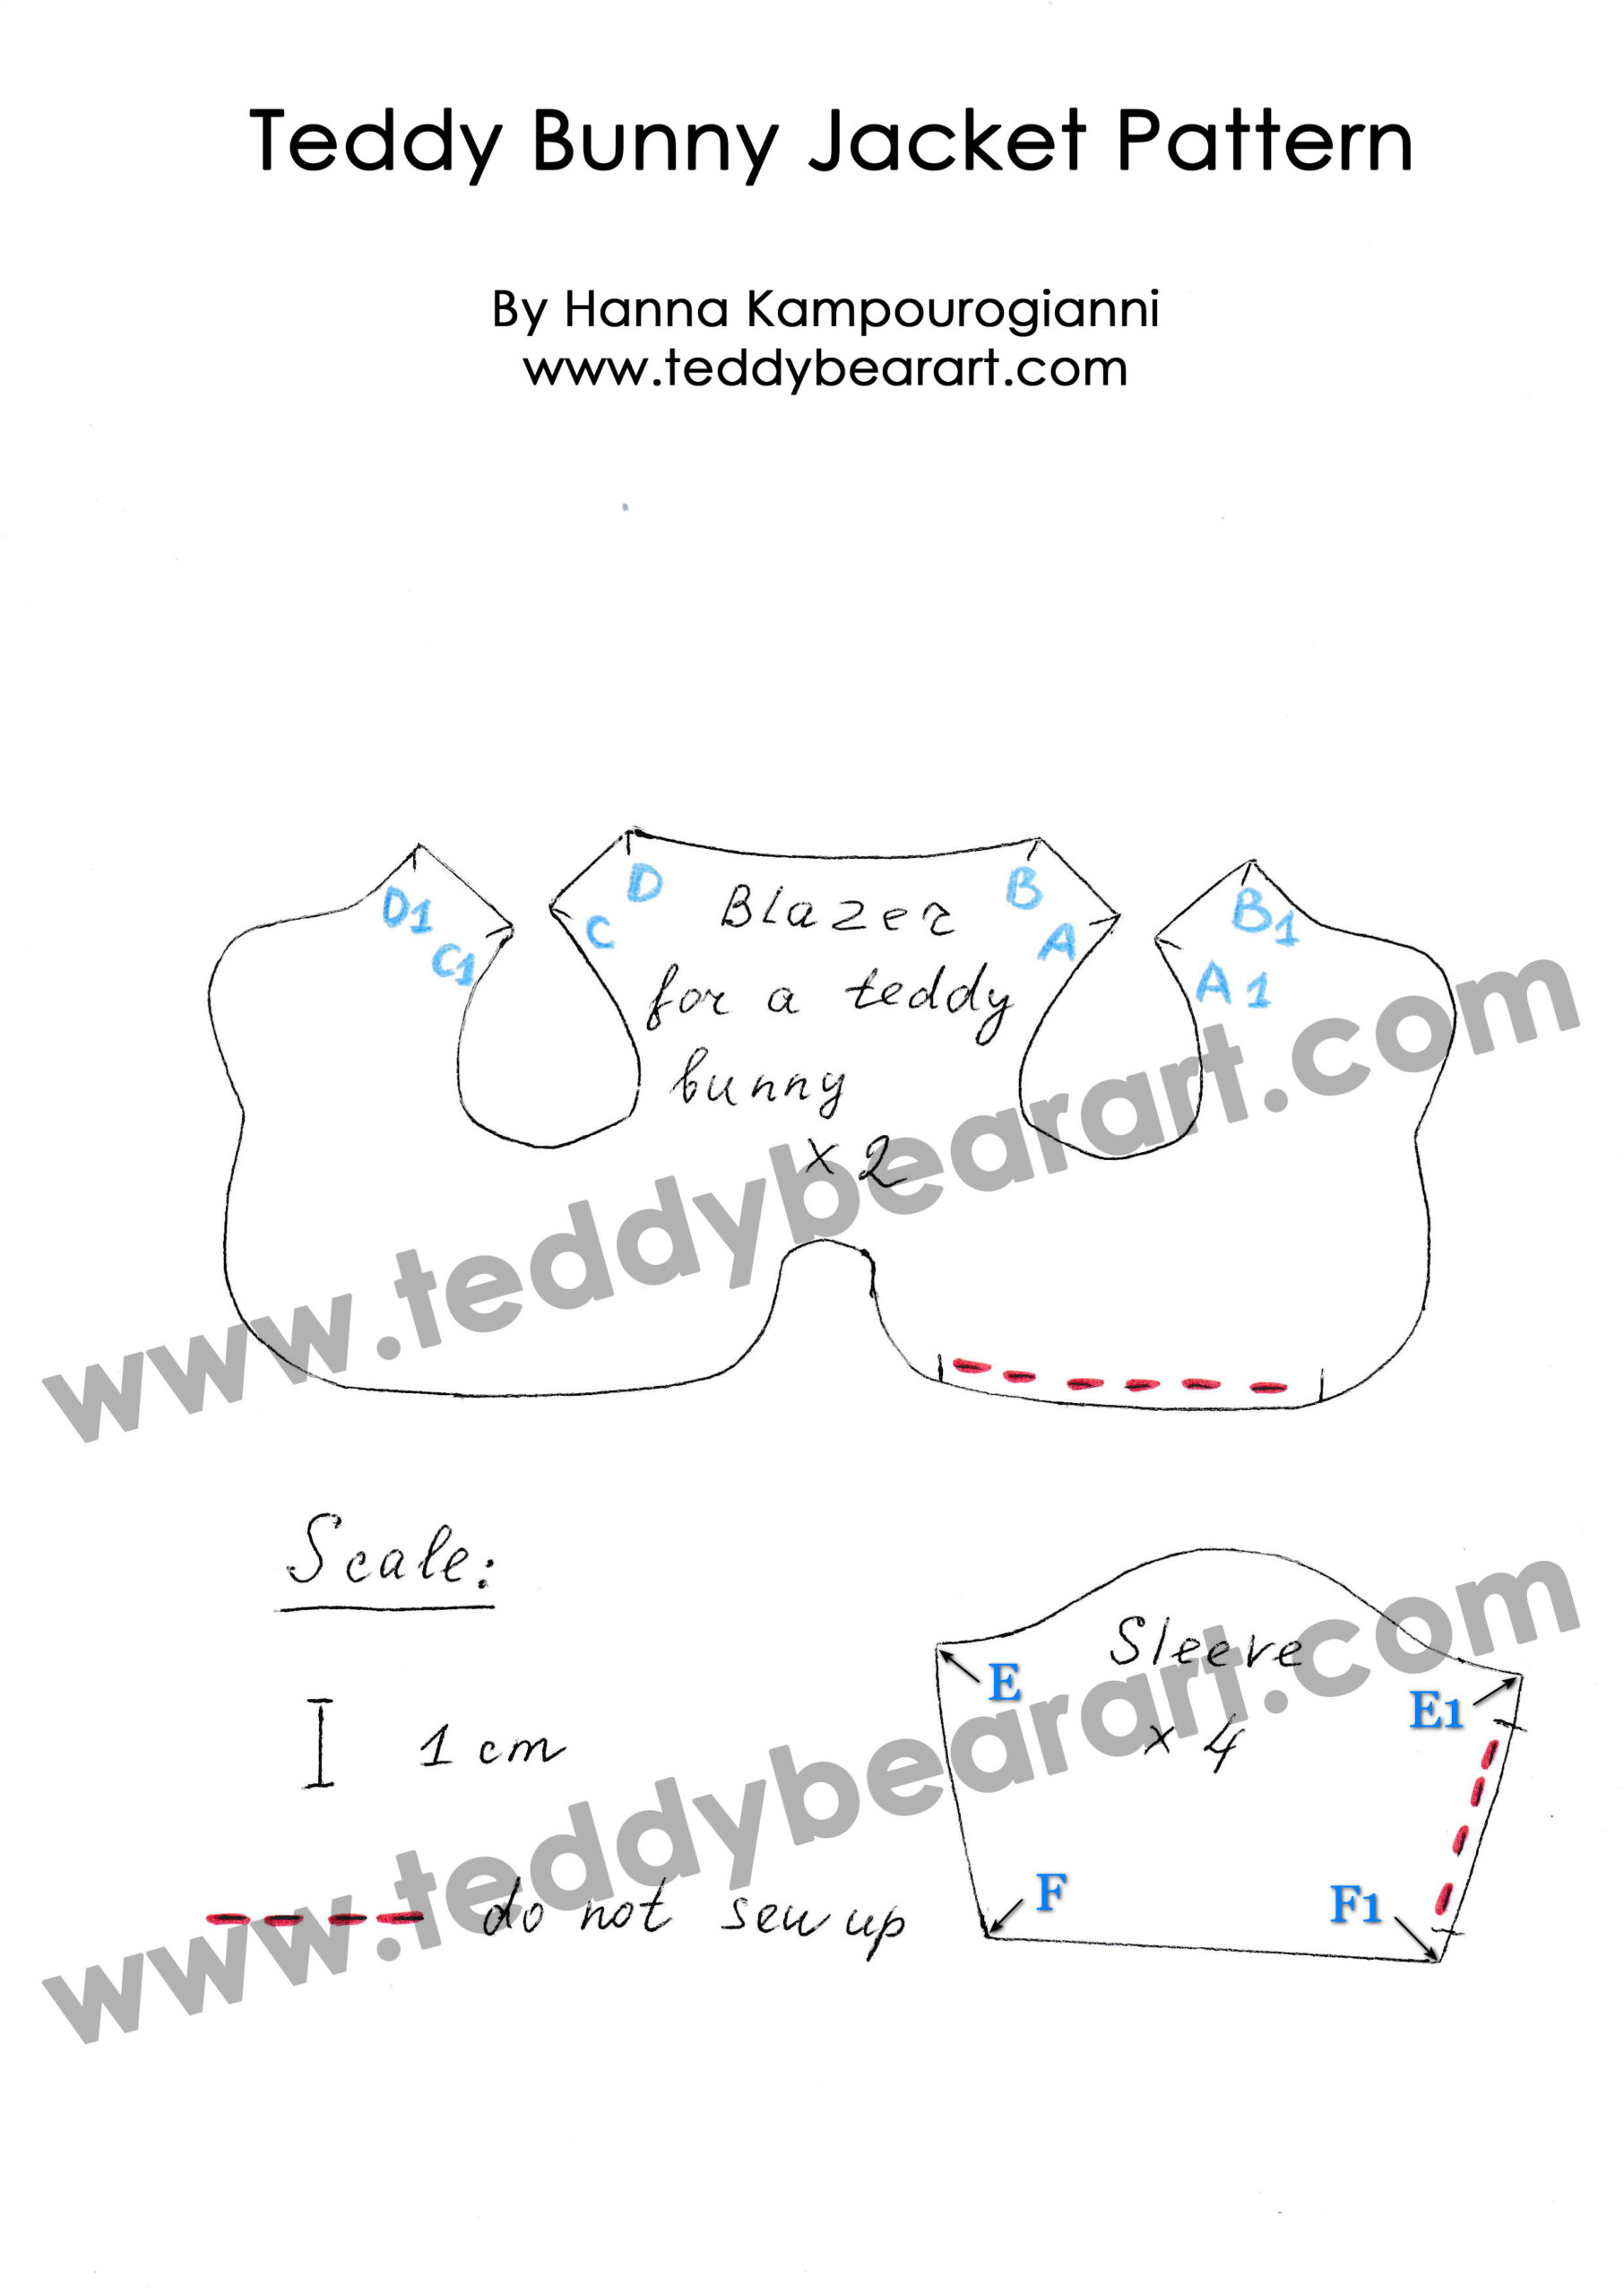
Download the Pattern
- From a computer (Windows).
Click on the photo of the pattern, and select the “Save image as …” option. - From a phone or a tablet (Android). There should be something similar for the iPad.
Click on the image. Save it by holding your finger on the image and selecting the “Save As” option. Then go to your photo gallery and print it (there is an option).
Find more free teddy bear clothes patterns – a hat, a dress, another dress, another jacket, and a knitted hat.
The List Of Materials
- Cotton fabric for the outside of the jacket.
- Cotton fabric for the inside of the jacket.
- A small piece of dense fabric for the pocket and a tab.
- Small buttons.
- Modeling clay Milliput White (or another of your choice).
- Acrylic colors and coating.
- Sewing machine. But you can also make this dress by hand sewing.
- Thread.
- Needle.
- Scissors.
- Pencil or disappearing pattern marker.
Your basic information about sewing and some types of seams (stitches) you can find here.
Pattern Tutorial
Download and print the pattern, following the scale I indicated (1 cm).
Also, you can transfer the jacket pattern from the screen of your device to baking paper or other thin paper using a soft pencil or pen.
Fold two pieces of fabric right sides together and transfer the pattern to the fabric. Sew with a back stitch by hand or on a sewing machine, leaving an unsewn space for turning inside out (indicated in red color).
Make the same with the sleeves. Fold the main and lining fabric right sides in, transfer the pattern to the fabric, and sew each sleeve.
Cut out the resulting pieces, leaving 5 mm of fabric from the seam. If you have zigzag scissors, cut with them. If there are no such scissors, then carefully make small cuts with ordinary scissors around the entire perimeter of the seam.
Try not to cut the seam. These incisions are made so that when everted, the product takes shape and does not bulge.
Turn out all the pieces, iron them, and sew up the turning holes. Open the jacket collar and iron it.
Now sew the side of each sleeve along the marks from E (E1) to F (F1) with a hidden seam.
Then sew the jacket according to the marks A to A1, B to B1, C to C1, and D to D1 with a hidden seam.
Finally, sew the sleeves to the jacket with a blind stitch.
Making Decoration
Sew the turn-down collar to the jacket so that it does not stick out. Sew a decorative stitch with contrasting threads around the entire perimeter of the jacket and on the sleeves.
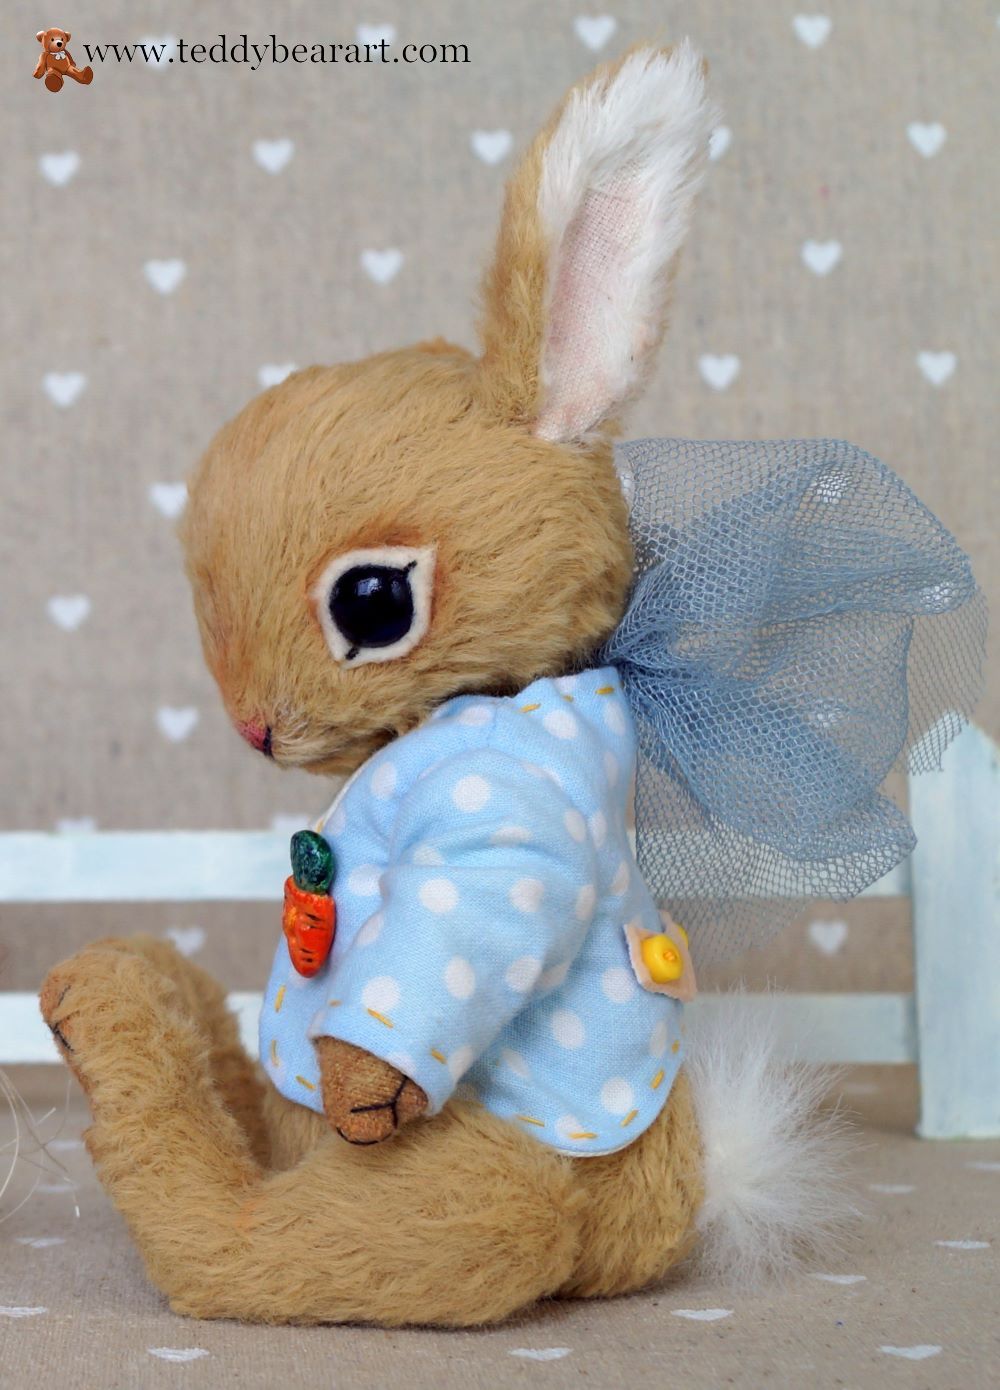
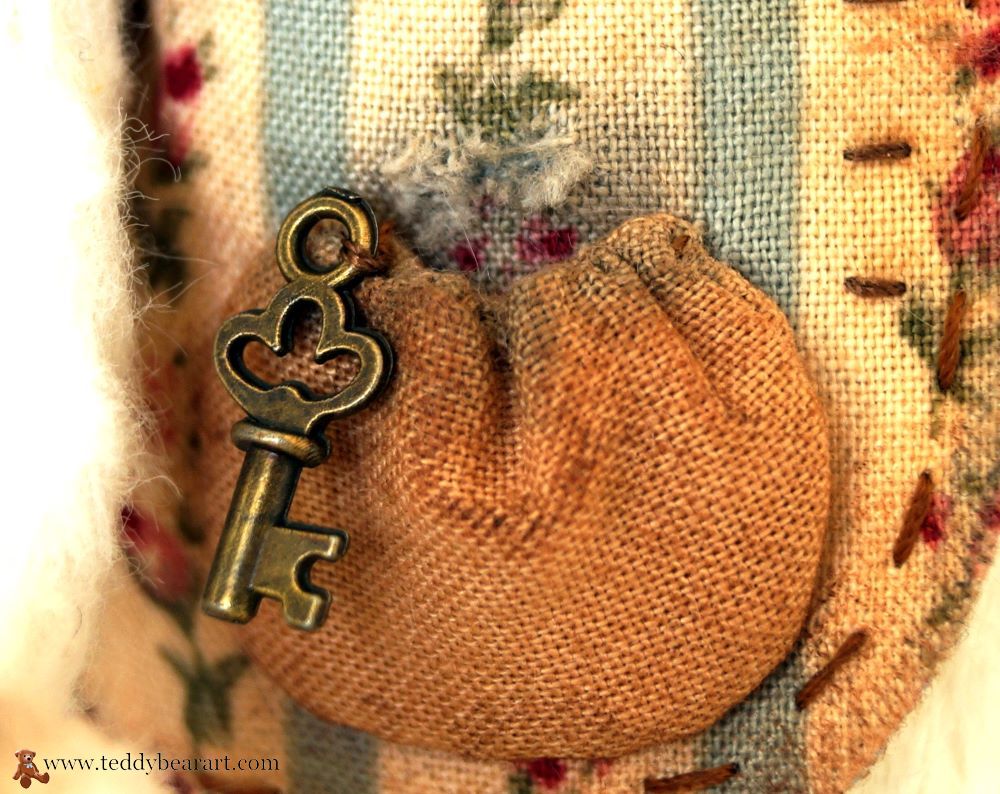
From a dense fabric, cut out a pocket and a strap. Sew two buttons onto the strap. Sew these elements to the jacket.
And of course, every rabbit wants to have a carrot!
I molded the carrot from Milliput White, a self-hardening clay. This is my favorite material for fine to medium detail work.
In the process of modeling, it immediately acquires a smooth surface, dries relatively quickly, and is beautifully painted. This material is very durable. And most importantly, there is no need to bake it in the oven. I avoid using a home oven for this kind of thing.
So, sculpt a carrot with two holes for sewing. After hardening, paint with acrylic paints and wait for drying again.
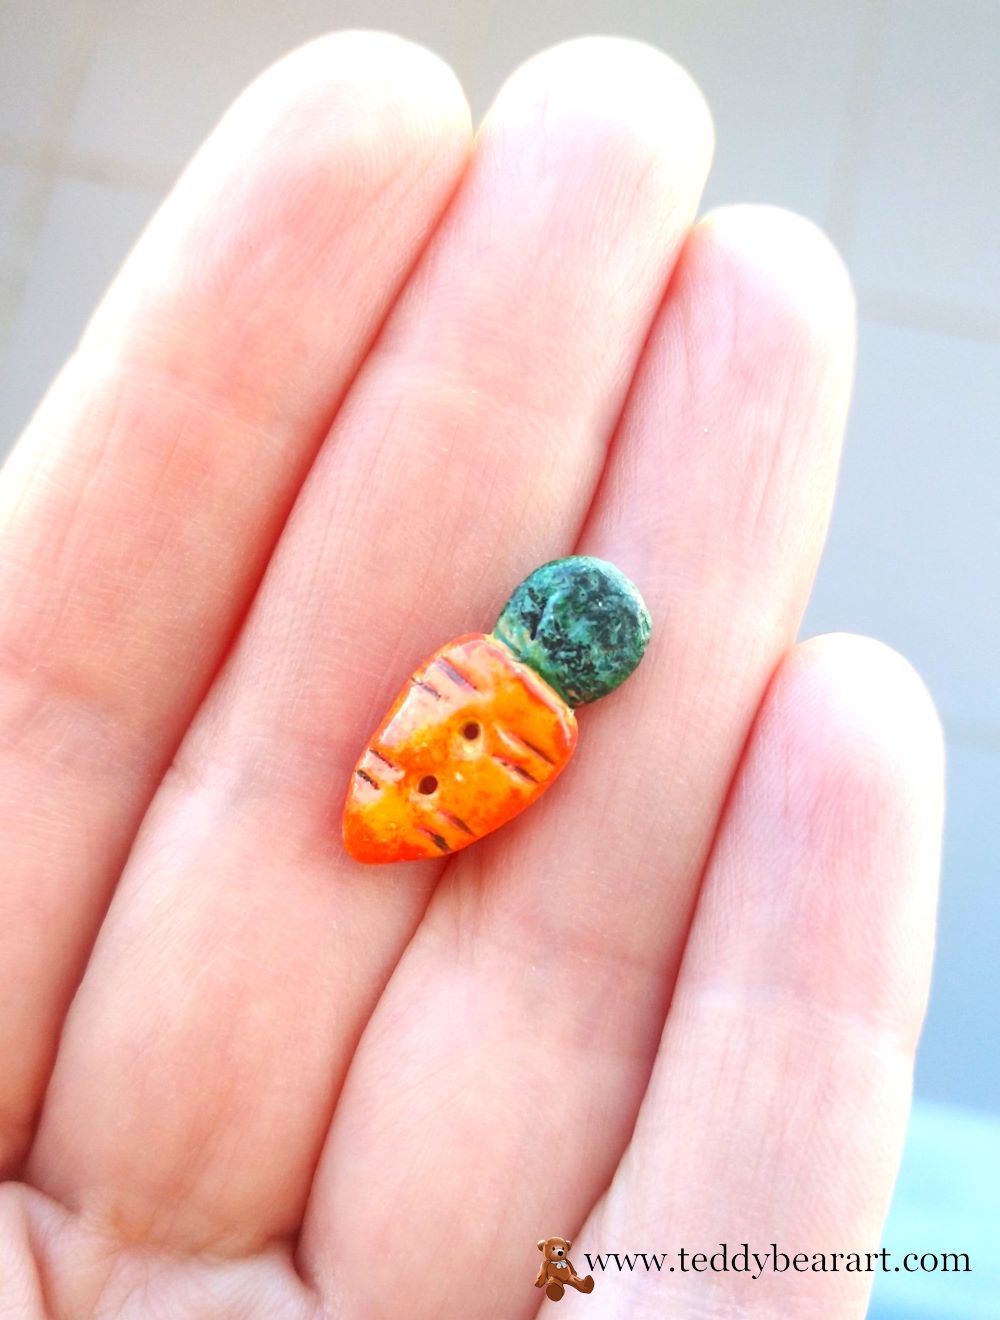
After that, be sure to cover it with a special varnish. I covered it with glossy acrylic varnish. Enjoy the result!
Sew the carrot to the jacket. Now the jacket for the teddy bunny is ready!
How To Give A Jacket An Aged Look
If you want your bear to look vintage, then his jacket will also have to be artificially aged. How to do this so that the result looks realistic?
You will need acrylic and oil paints.
Acrylic paints can make perfect spots. To do this, dilute black or brown paint with water and spray it onto the jacket with a brush. Iron dry immediately.

Practice on the fabric first, because, after heat treatment, the stains become brighter. And you need to understand how bright or muted you want them to be.
Using oil paint, you can make beautiful, realistic scuffs around the pocket, sleeves, and bottom of the jacket. To do this, pick up a little brown paint on the brush and wipe the brush well on a sheet of paper. When there is almost no paint left, we paint the jacket.
Another way of artificial aging is making holes. You will need sandpaper for this.
Using scissors, make a small hole in the jacket (2 mm in size). Be very careful not to cut the clothes. After that, take sandpaper and grind this hole until threads appear on its edges. That is it!
You can also wet, wrinkle, and dry the finished jacket in a wrinkled form.
And the last aging method that I know is applying pretty patches to the jacket with contrasting threads.
The most important thing is not to overdo it and not to do everything superfluously. Follow the measure, follow your taste, and do the experiments!
Conclusion
Congratulations! You have a jacket pattern for your teddy bunny. And you know how to sew it. It can be modified for other teddies (teddy bears, teddy cats, teddy dogs, and so on).
You have learned how to decorate a jacket, how to sculpt a small, cute carrot, and how to give a vintage look to a jacket.
Feel free to sew and sell jackets from this pattern. It will be very pleasant for me if you indicate my name.
If you know other easy ways to make a jacket for teddies and are ready to share them, please do it in the comments below.
You can find more teddy bear clothes patterns on this website.
If you ever need a hand or have any questions, feel free to leave them in the comments below, and I will be more than happy to help you out.
Get Free Patterns & Be the First to Know!
Want free teddy bear patterns, exclusive tutorials, and a chance to win craft supplies?
Sign up for our newsletter using the subscribe form in the middle of this article to receive new patterns, insider tips, and the latest news on teddy bear art. You’ll also automatically be entered into our annual giveaway for a chance to win teddy bear crafting materials.
Bonus entry: Save one of our pins on Pinterest to increase your chances of winning!
Let’s create, inspire, and craft beautiful teddy bears together!