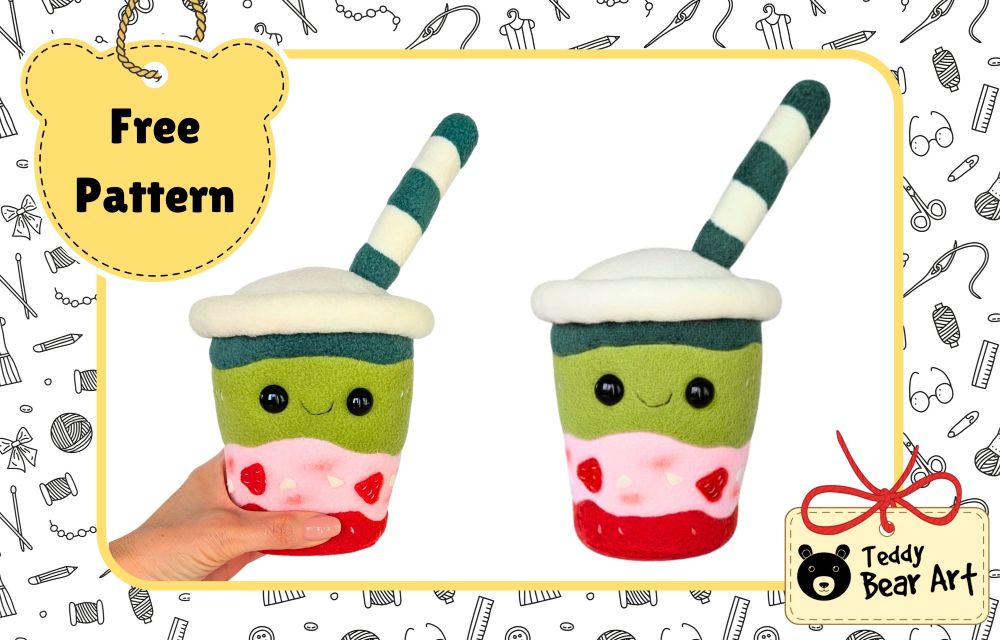
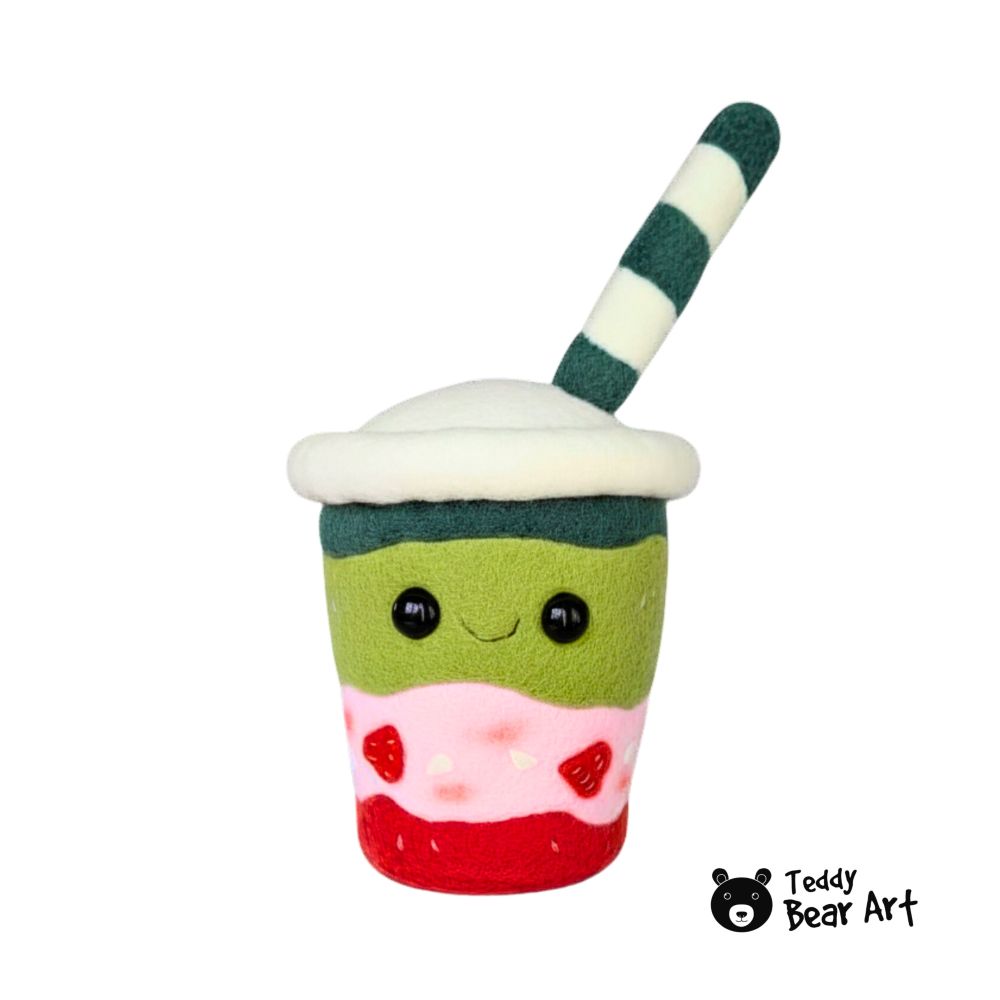
I wanted to sew something cute, colorful, and a little different from the usual animal plushies, so this strawberry matcha latte plush was born. In this drink plushie DIY tutorial, I’ll show you how to make it from fleece with a free sewing pattern. I wanted this plush drink to look like a strawberry matcha latte in a soft cup, with strawberry syrup at the bottom, creamy pink, bright green matcha, a darker green top layer, a fluffy white rim, and a striped straw.
You can use this strawberry matcha latte plush as a handmade gift, craft fair idea, room decoration, or just a fun sewing break between bigger projects. The shape is simple, but the little details make it feel special.
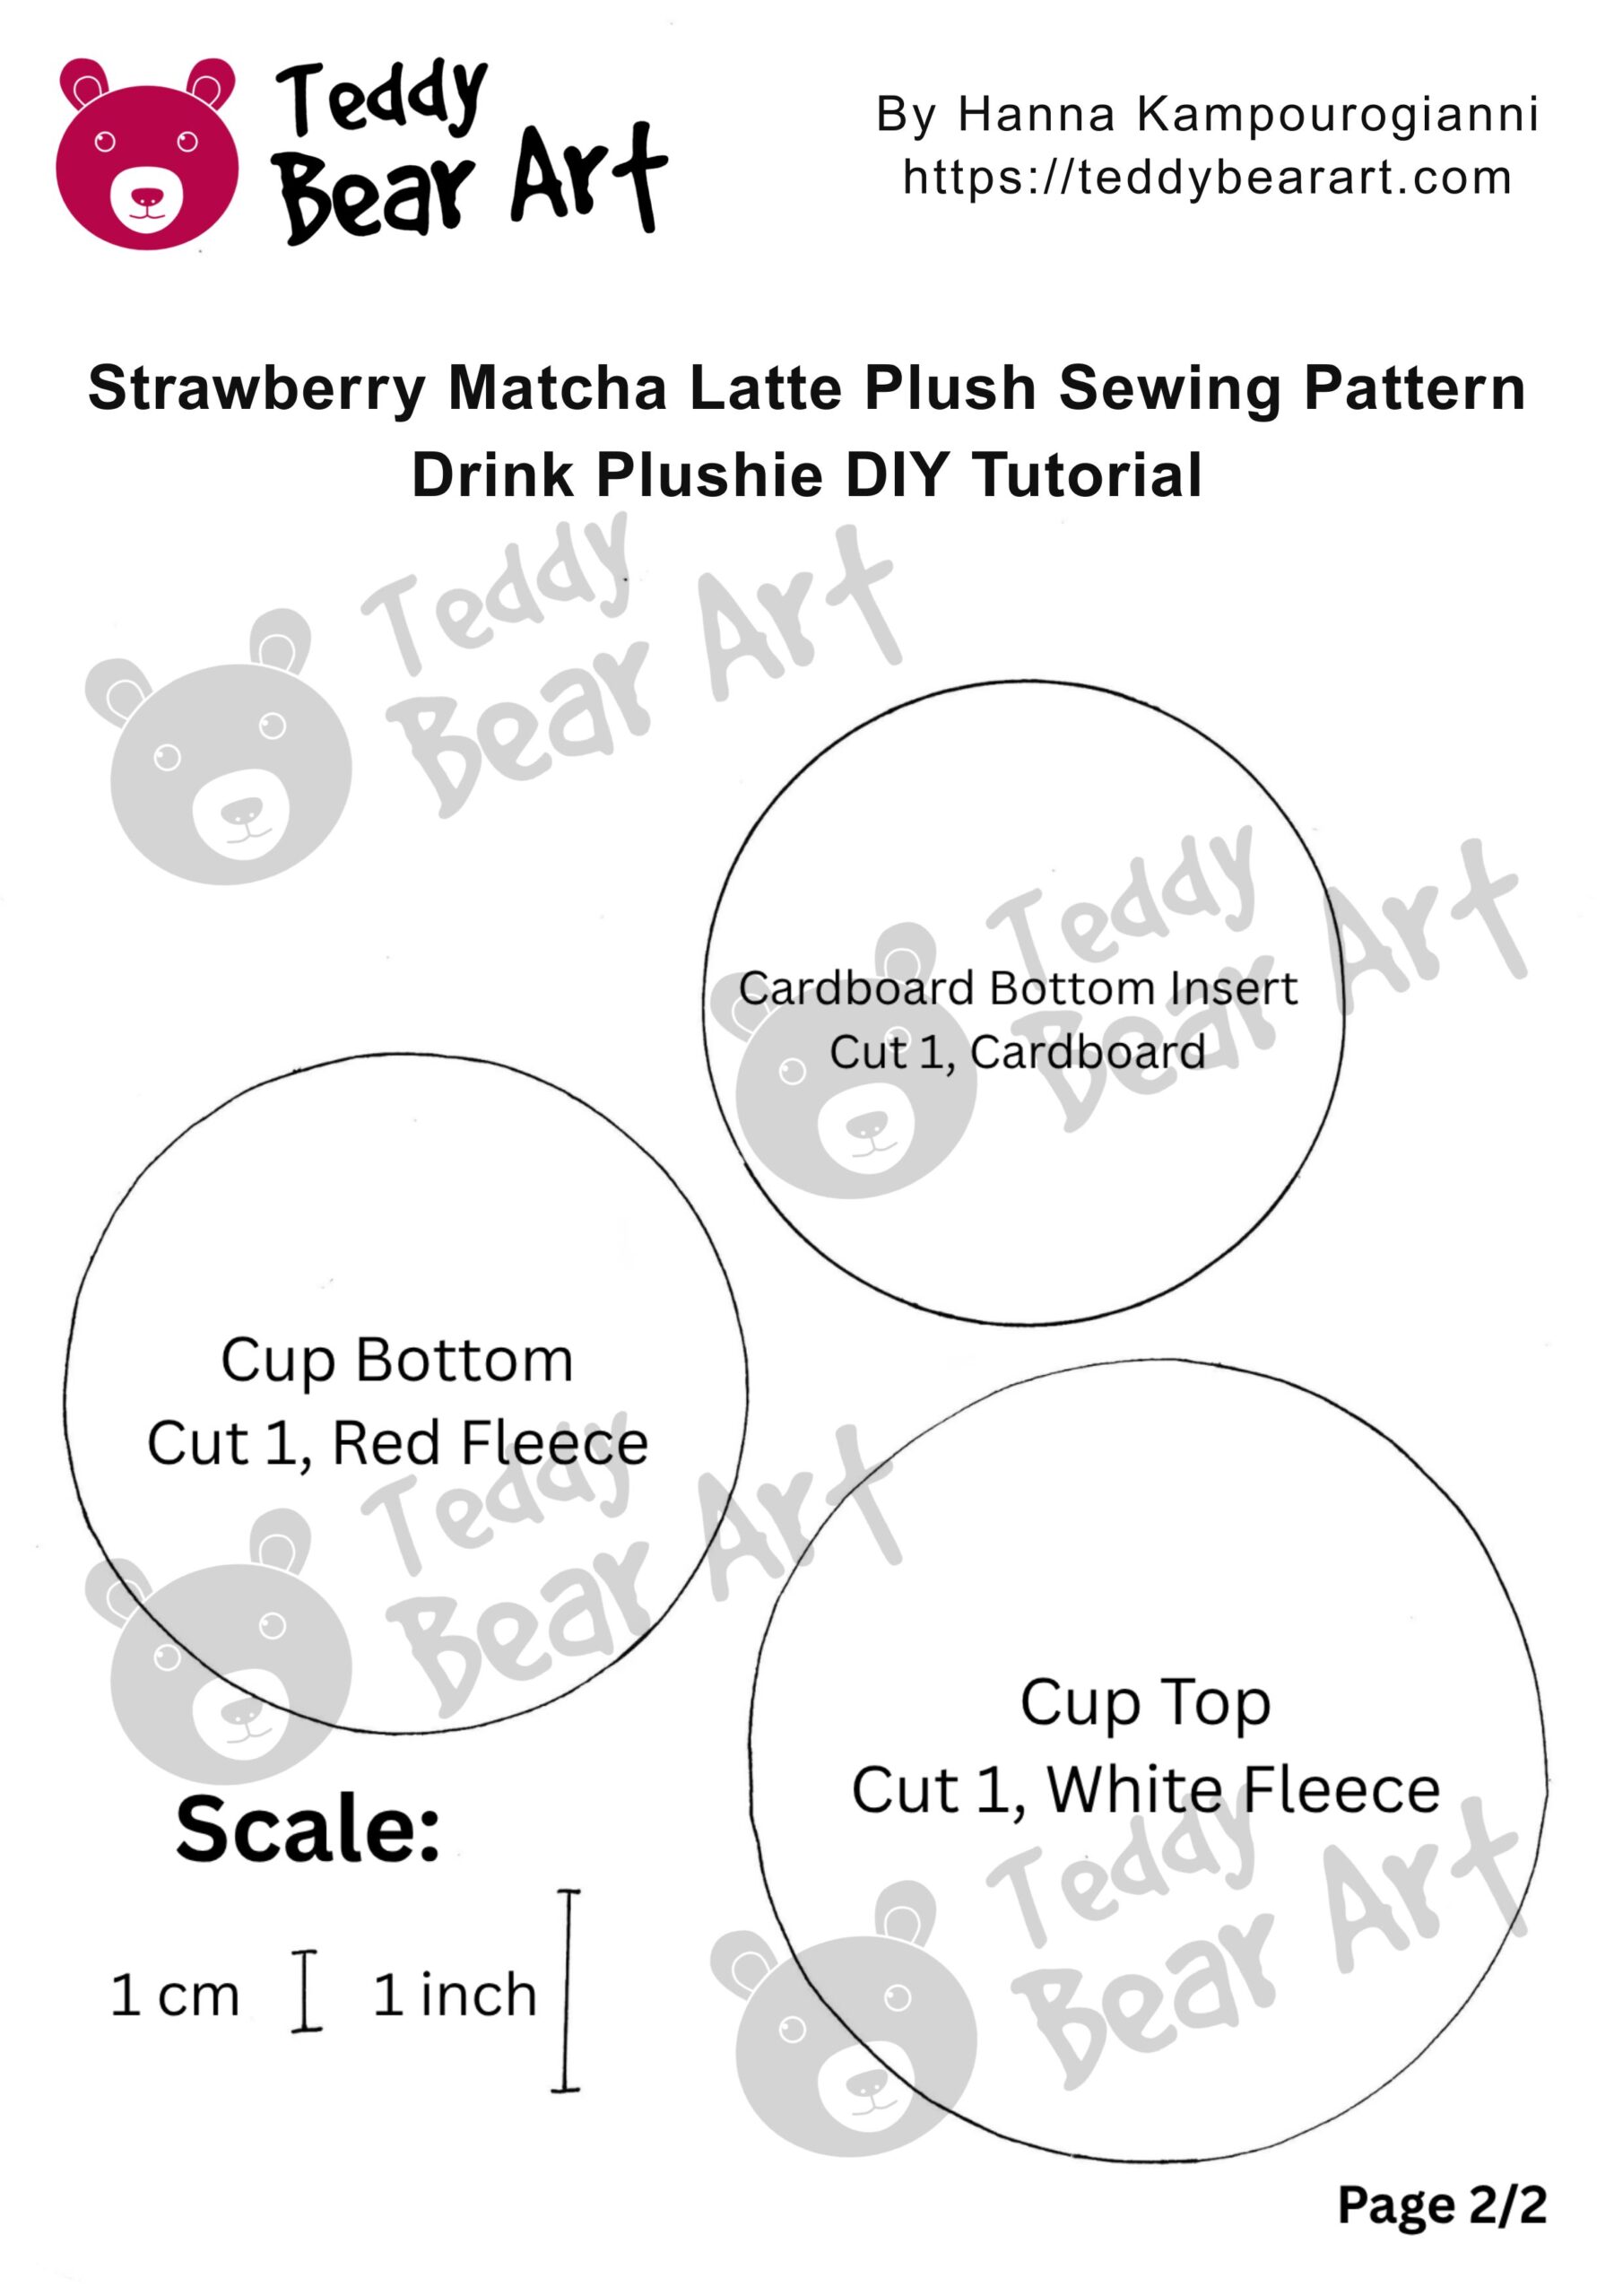
Download the Pattern
Notice that seam allowances are not included. For this project, it is fine to include 5 mm for seam allowances.
To download the pattern, follow the instructions below:
From a phone or tablet: There should be a similar option for mobile devices with Android or iOS. Click on the image. Save it by holding your finger on the image and selecting the “Save Image” option. Then, go to your photo gallery and print it (an option available).
From a computer: Click on the photo of the pattern you see below. In the new tab that will open, you press the right mouse button and select the “Save image as …” option. Then, you choose where the image will be saved on your computer.

Materials You Will Need
- Red fleece
- Pink fleece
- Bright green fleece
- Dark green fleece
- White fleece
- Safety eyes, beads, or embroidery thread for the face
- Stuffing
- A small piece of cardboard for the bottom
- Needle and thread
- Pins or sewing clips
- Red or pink textile marker, blush, or soft pastel for the strawberry juice effect
- Scissors
- Glue, optional, for tiny decorative details
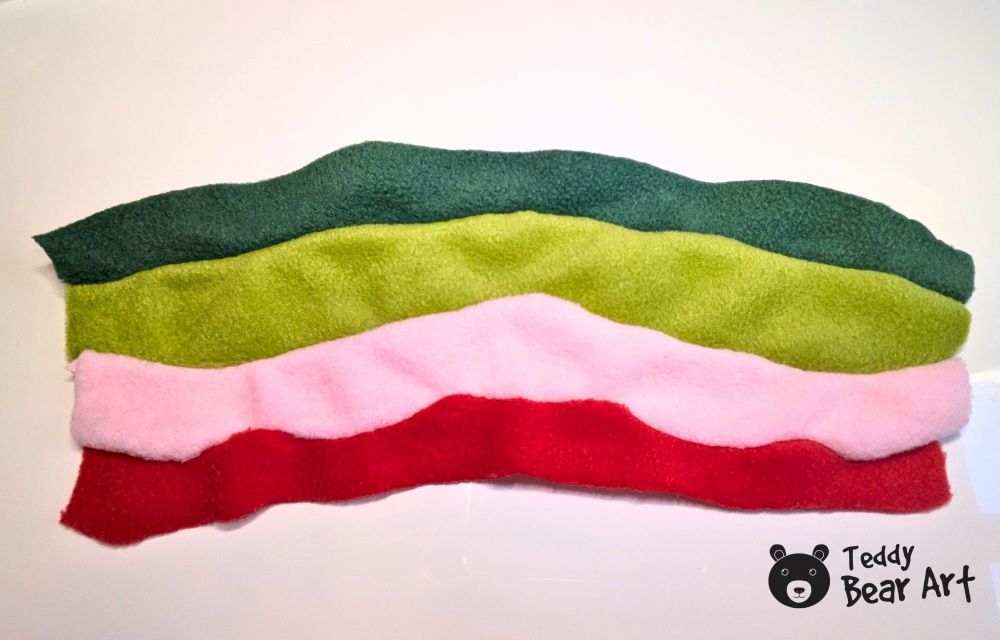
Before cutting your fleece, look carefully at the colored drink layers on the pattern. These layer pieces are shown as half pattern pieces because the full long shapes do not fit neatly on one printable page.
Do not cut these pieces on the fold of fleece. Fleece is thick, and if you fold it, the layers can move. Since the wavy lines need to match nicely, it is better to make a full paper pattern first, then cut the fleece in one layer.
You can do this in two easy ways.
Option 1, trace and flip the half piece. Cut out the half layer from the printed pattern. Place it on a clean sheet of paper and trace around it. Then flip the same pattern piece over along the center line and trace the second half. Now you have one full long layer on paper. Cut it out and use that full piece to cut your fleece.
Option 2, print the pattern twice. Cut out two matching half pieces. Mirror one of them and tape both halves together at the center line. Do not overlap the paper pieces when you tape them, because that will make the finished layer shorter. The edges should meet exactly at the center line.
Once you have full paper pieces for the red, pink, bright green, and dark green drink layers, you can place them on a single layer of fleece and cut them accurately.
How To Sew The Strawberry Matcha Latte Plush
Start with the drink body. Sew the colored layers together one after another. First join the red layer to the pink layer, then add the bright green layer, then the dark green layer. Work slowly and pin or clip the fleece well, especially along the wavy edges. These soft curves are what make the drink look like it has pretty mixed layers.
After the colored body is sewn, attach the red bottom piece. This creates the base of the cup. Then sew the white top piece to the upper edge of the cup body.
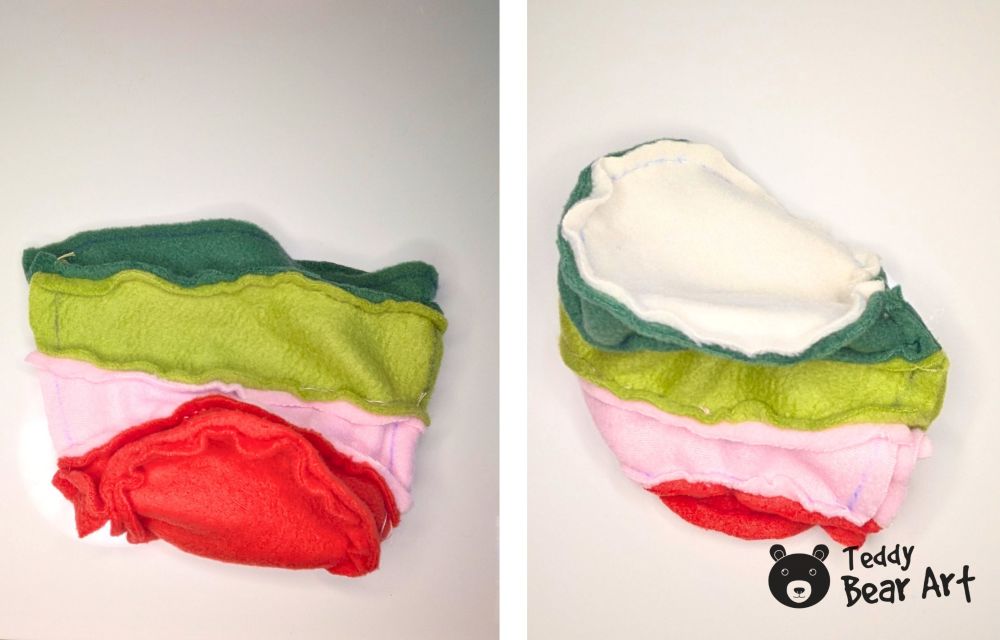
Now sew the side seam of the cup, but leave an opening for turning and stuffing. Turn the cup right side out and gently push out the shape with your fingers. Do not pull too hard, because fleece can stretch if you force it.
Place the cardboard circle inside the bottom of the cup. This helps the strawberry matcha latte plush stand upright. Then fill the cup with stuffing. Add enough stuffing to give the cup a nice shape, but do not overstuff it so much that the sides become lumpy.
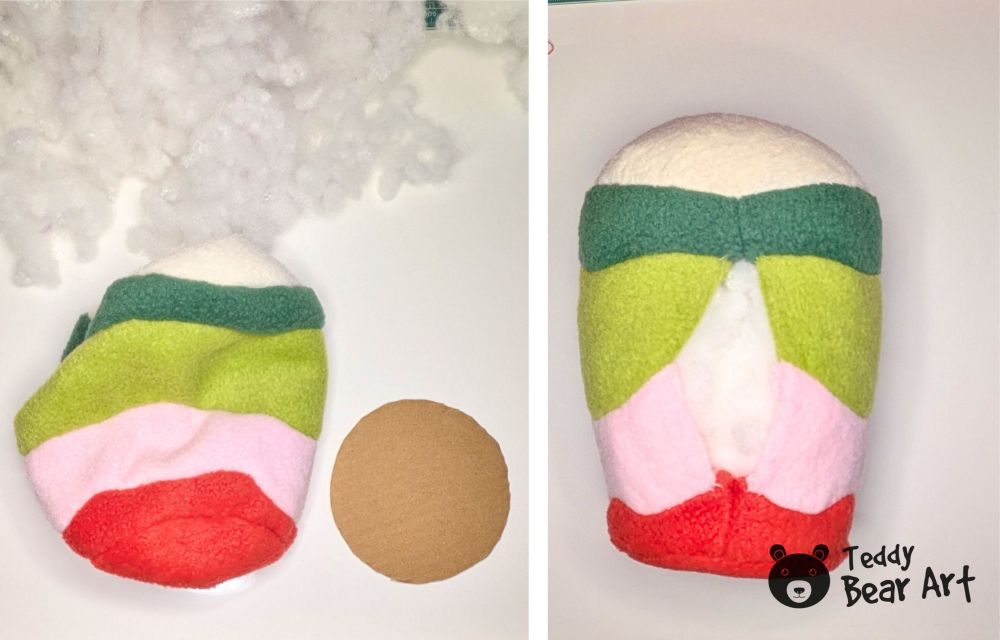
Add the eyes before sewing on the white rim. This is important because the rim can help hide threads inside the cup area and under the rim. You can use safety eyes (but need to insert them before stuffing), small black beads, or embroidered eyes. If this plush will be used by a small child, embroidered eyes are the safest option.
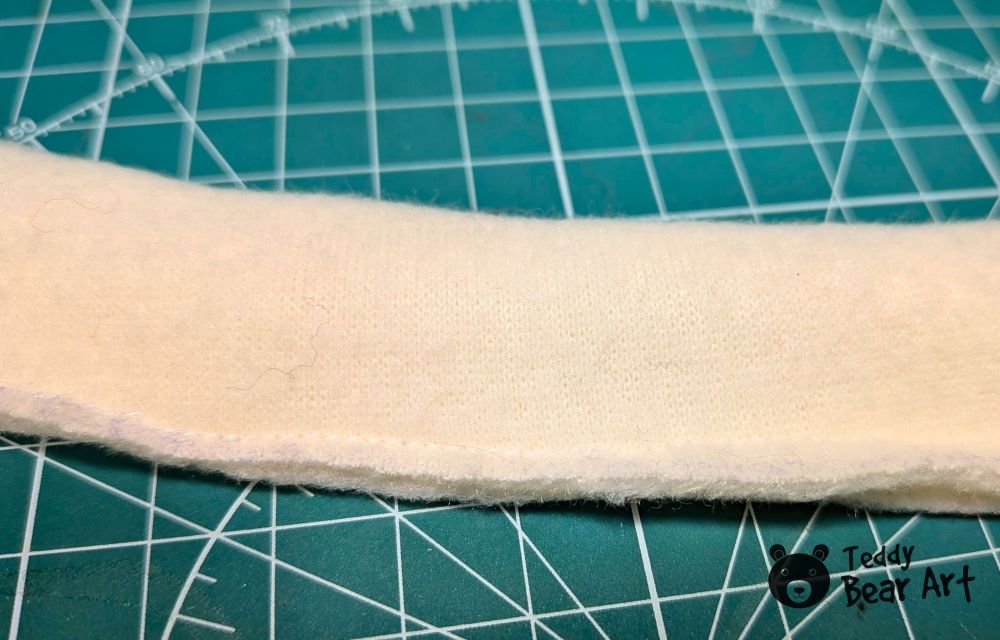
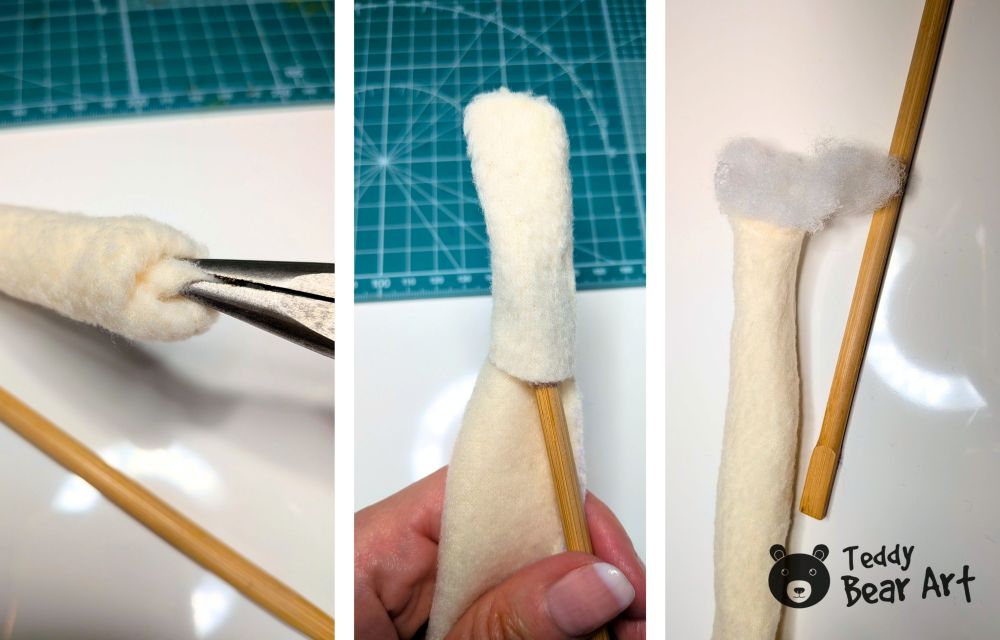
Next, make the white fleece rim. Cut a strip of white fleece about 40 cm long (no need seam allowance) and 5 cm high (plus seam allowance). Sew the strip into a soft tube, turn it right side out, and stuff it lightly. The rim should look round and soft, not too hard. Hand sew it around the top of the cup. Try to keep the join at the back or near the straw area so it is less noticeable.
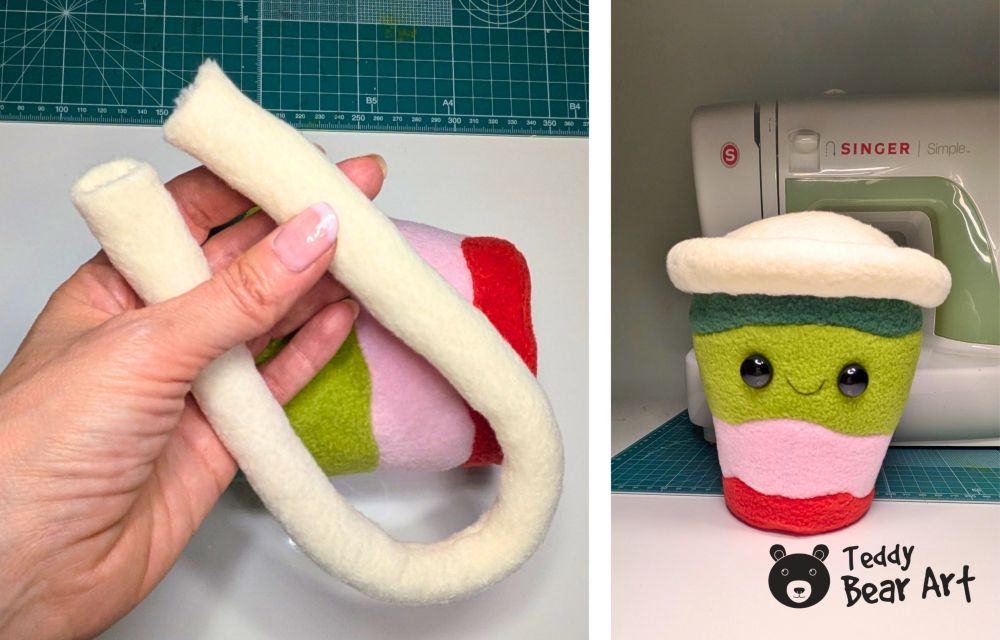
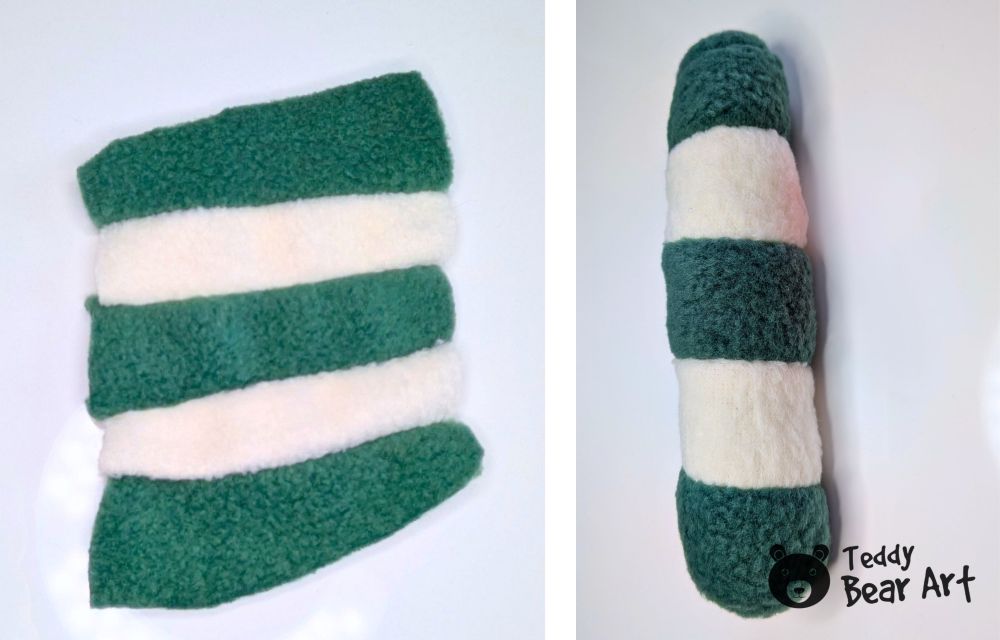
Now make the straw. Sew together small green and white fleece pieces to create a striped strip of fabric. Then sew the straw shape, leaving a small opening for turning. Sew on the circles at the top and bottom of the straw. Turn it right side out, stuff it lightly, and sew it to the top of the cup.
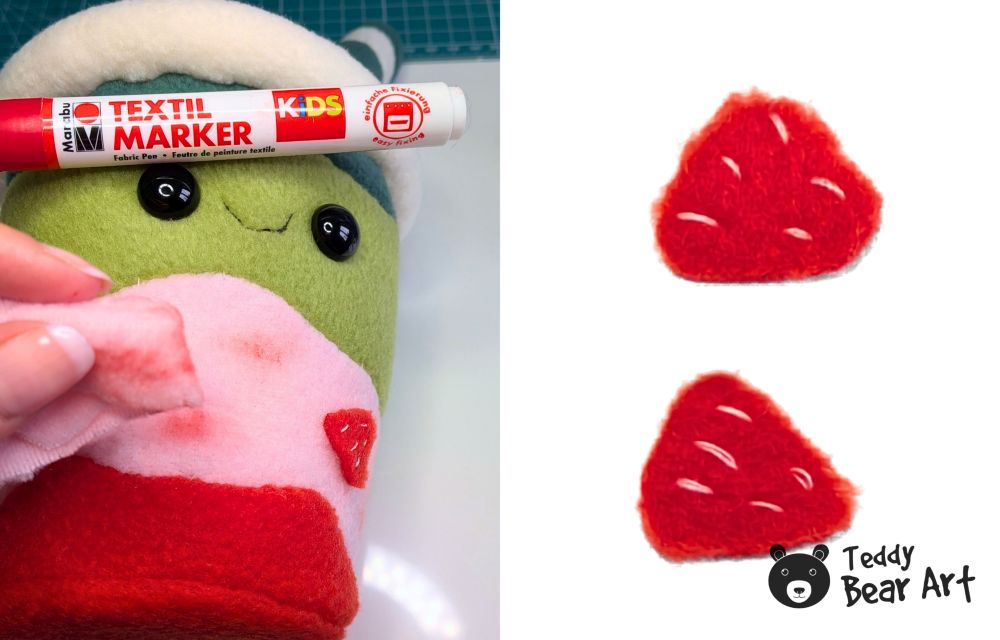
Finally, add the decoration. You can glue or hand sew small fleece strawberry pieces onto the red and pink areas. Add tiny white fleece pieces to imitate strawberry seeds or creamy bits. A little hand embroidery makes the plush look more handmade and charming. For the strawberry juice effect, lightly shade some areas with a red textile marker, blush, or pastel. Blend it gently so it looks soft, not like hard marker lines.

Tips For A Neater Fleece Drink Plushie
The most important part of this project is accurate cutting. Since the drink has several colored layers, uneven cutting can make the waves look messy. That is why I prefer cutting fleece in one layer, not on the fold.
Use plenty of clips or pins before sewing each layer. Fleece likes to shift, especially when one layer stretches more than the other. For this project hand sewing is recommended, because it gives more control than sewing machine.
Do not overstuff the cup body. A plush drink should feel soft and rounded, but the sides still need to keep the cup shape. The cardboard base helps with this, so the stuffing does not have to do all the work.
For the face, keep it simple. Two small eyes are enough. The drink already has many colors and details, so a very busy face can make the design look crowded.
This pattern can also be changed into other drinks. Use brown and cream fleece for coffee, yellow and white for lemonade, purple and pink for a berry smoothie, or beige and dark brown for boba tea. Once you understand the cup shape, the same idea can become many different plush drinks.
Frequently Asked Questions
Is this drink plushie beginner-friendly?
Yes, it is beginner-friendly if you take your time with the cutting and layer sewing. The shape is simple, but the colorful layers need a little patience.
Can I skip the cardboard inside the bottom?
You can skip it, but the plush may not stand as well. The cardboard helps keep the bottom flat and stable.
Can I use felt instead of fleece?
You can use felt for small details, but I would use fleece for the main cup body. Felt will give a flatter and less soft result.
Before You Go
This strawberry matcha latte plush is a fun little project if you enjoy sewing cute food plushies and soft decorative toys. The layers make it colorful, the straw makes it playful, and the white fleece rim gives it that finished drink-shop look. Once you make one, it is very easy to imagine a whole collection of fleece plush drinks in different flavors.
You may also like my free easy ice cream plush pattern tutorial for another cute fleece food plush project:
Get Free Patterns & Be the First to Know!
Want free teddy bear patterns, exclusive tutorials, and a chance to win craft supplies?
Sign up for our newsletter using the subscribe form in the middle of this article to receive new patterns, insider tips, and the latest news on teddy bear art. You’ll also automatically be entered into our annual giveaway for a chance to win teddy bear crafting materials.
Bonus entry: Save one of our pins on Pinterest to increase your chances of winning!
Let’s create, inspire, and craft beautiful teddy bears together!
Hi Hanna,
I really enjoyed this tutorial. My daughter has recently become interested in sewing soft toys, and this strawberry matcha latte plushie immediately caught my attention because it looks fun, colorful, and not too intimidating for a beginner.
I also liked that the photos make the steps easier to understand. Some sewing tutorials feel a little overwhelming when you are trying to help a beginner, but this one looks much more approachable.
Do you think this pattern would be a good project for a young beginner who has only tried a few simple sewing projects before, or would you recommend starting with an even simpler plushie first?
Cheers,
Boris
Hi Boris,
Thank you so much for your lovely comment! I think this pattern can be a nice project for a young beginner, especially if she already has a little sewing experience and someone can help her with the cutting, pinning, and curved seams.
For a very first sewing machine project, I would probably start with something even simpler, like a basic plushie with fewer small details. But if your daughter is patient and likes colorful projects, this strawberry matcha latte plushie could be a really fun next step.
I hope she enjoys making her own little drink plushie!
Best,
Hanna
WOW, I have honestly never seen anything like this before! So cool, creative, and unique. I have seen coffee plushies before, but a strawberry matcha latte plushie? Never! You are really setting trends with this idea. Thank you so much for sharing such an adorable tutorial and pattern for free.
Thank you so much! Your comment made me smile. I also felt that a strawberry matcha latte plushie was something a little different and fun to try. I love creating unusual plush ideas, especially when they can inspire other makers to experiment with colors, shapes, and details. I’m really happy you enjoyed the tutorial, and I hope it gives you a fun new sewing idea to try.