
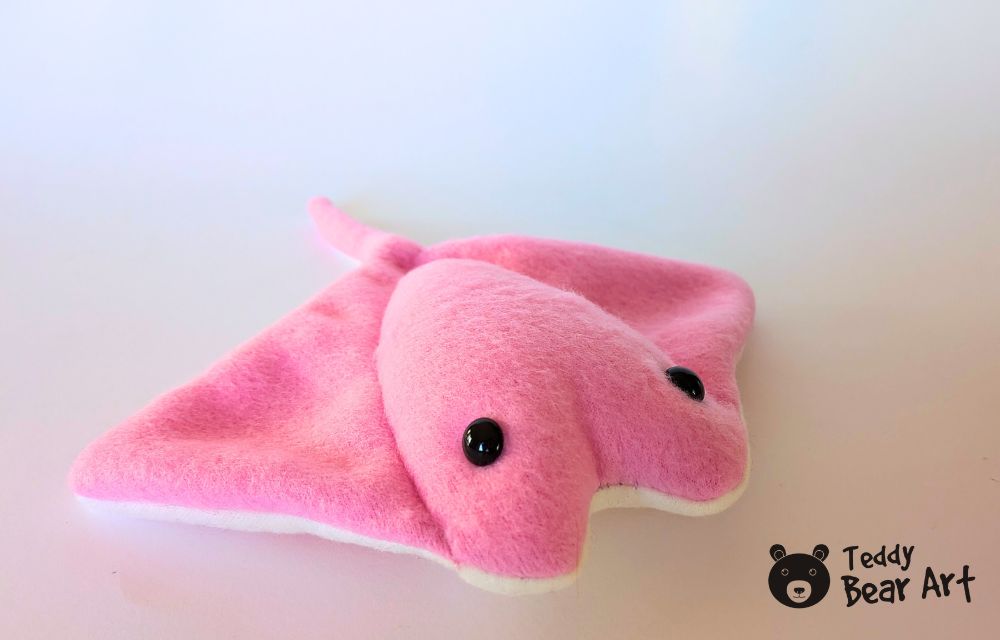
If you want to learn how to sew a manta ray plush, this free easy fleece pattern is a simple and sweet ocean animal project. I made mine from pink and white fleece, with a soft raised belly and small glass eyes. The pattern is easy because the plush starts with only two main fabric pieces, the back and the belly.
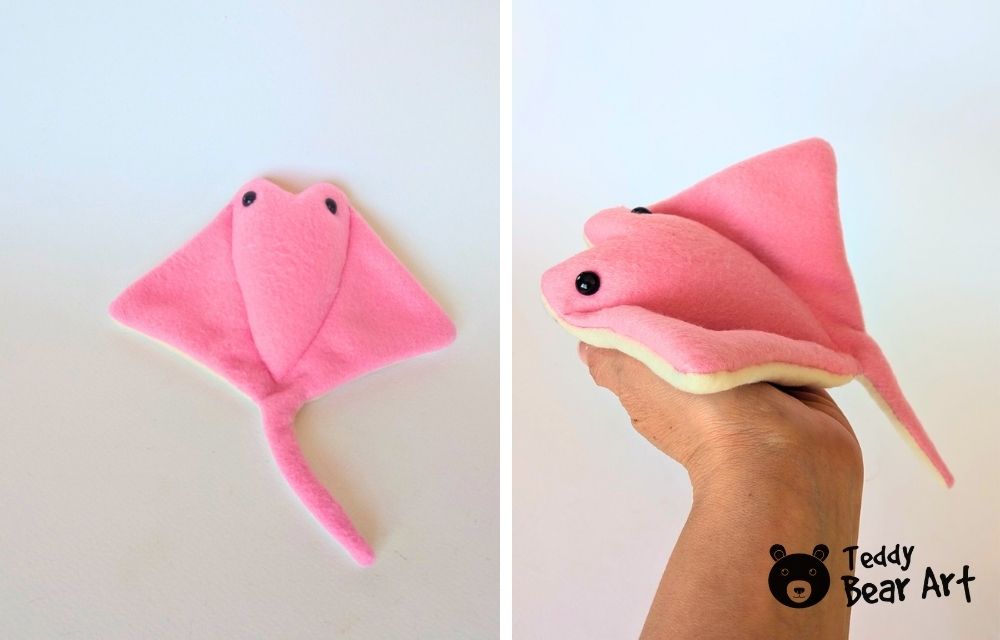
This manta ray is a nice project for beginners, but it still has a lovely finished look because of the stitched belly lines. They give the plush more shape and make it look more interesting than a completely flat toy.
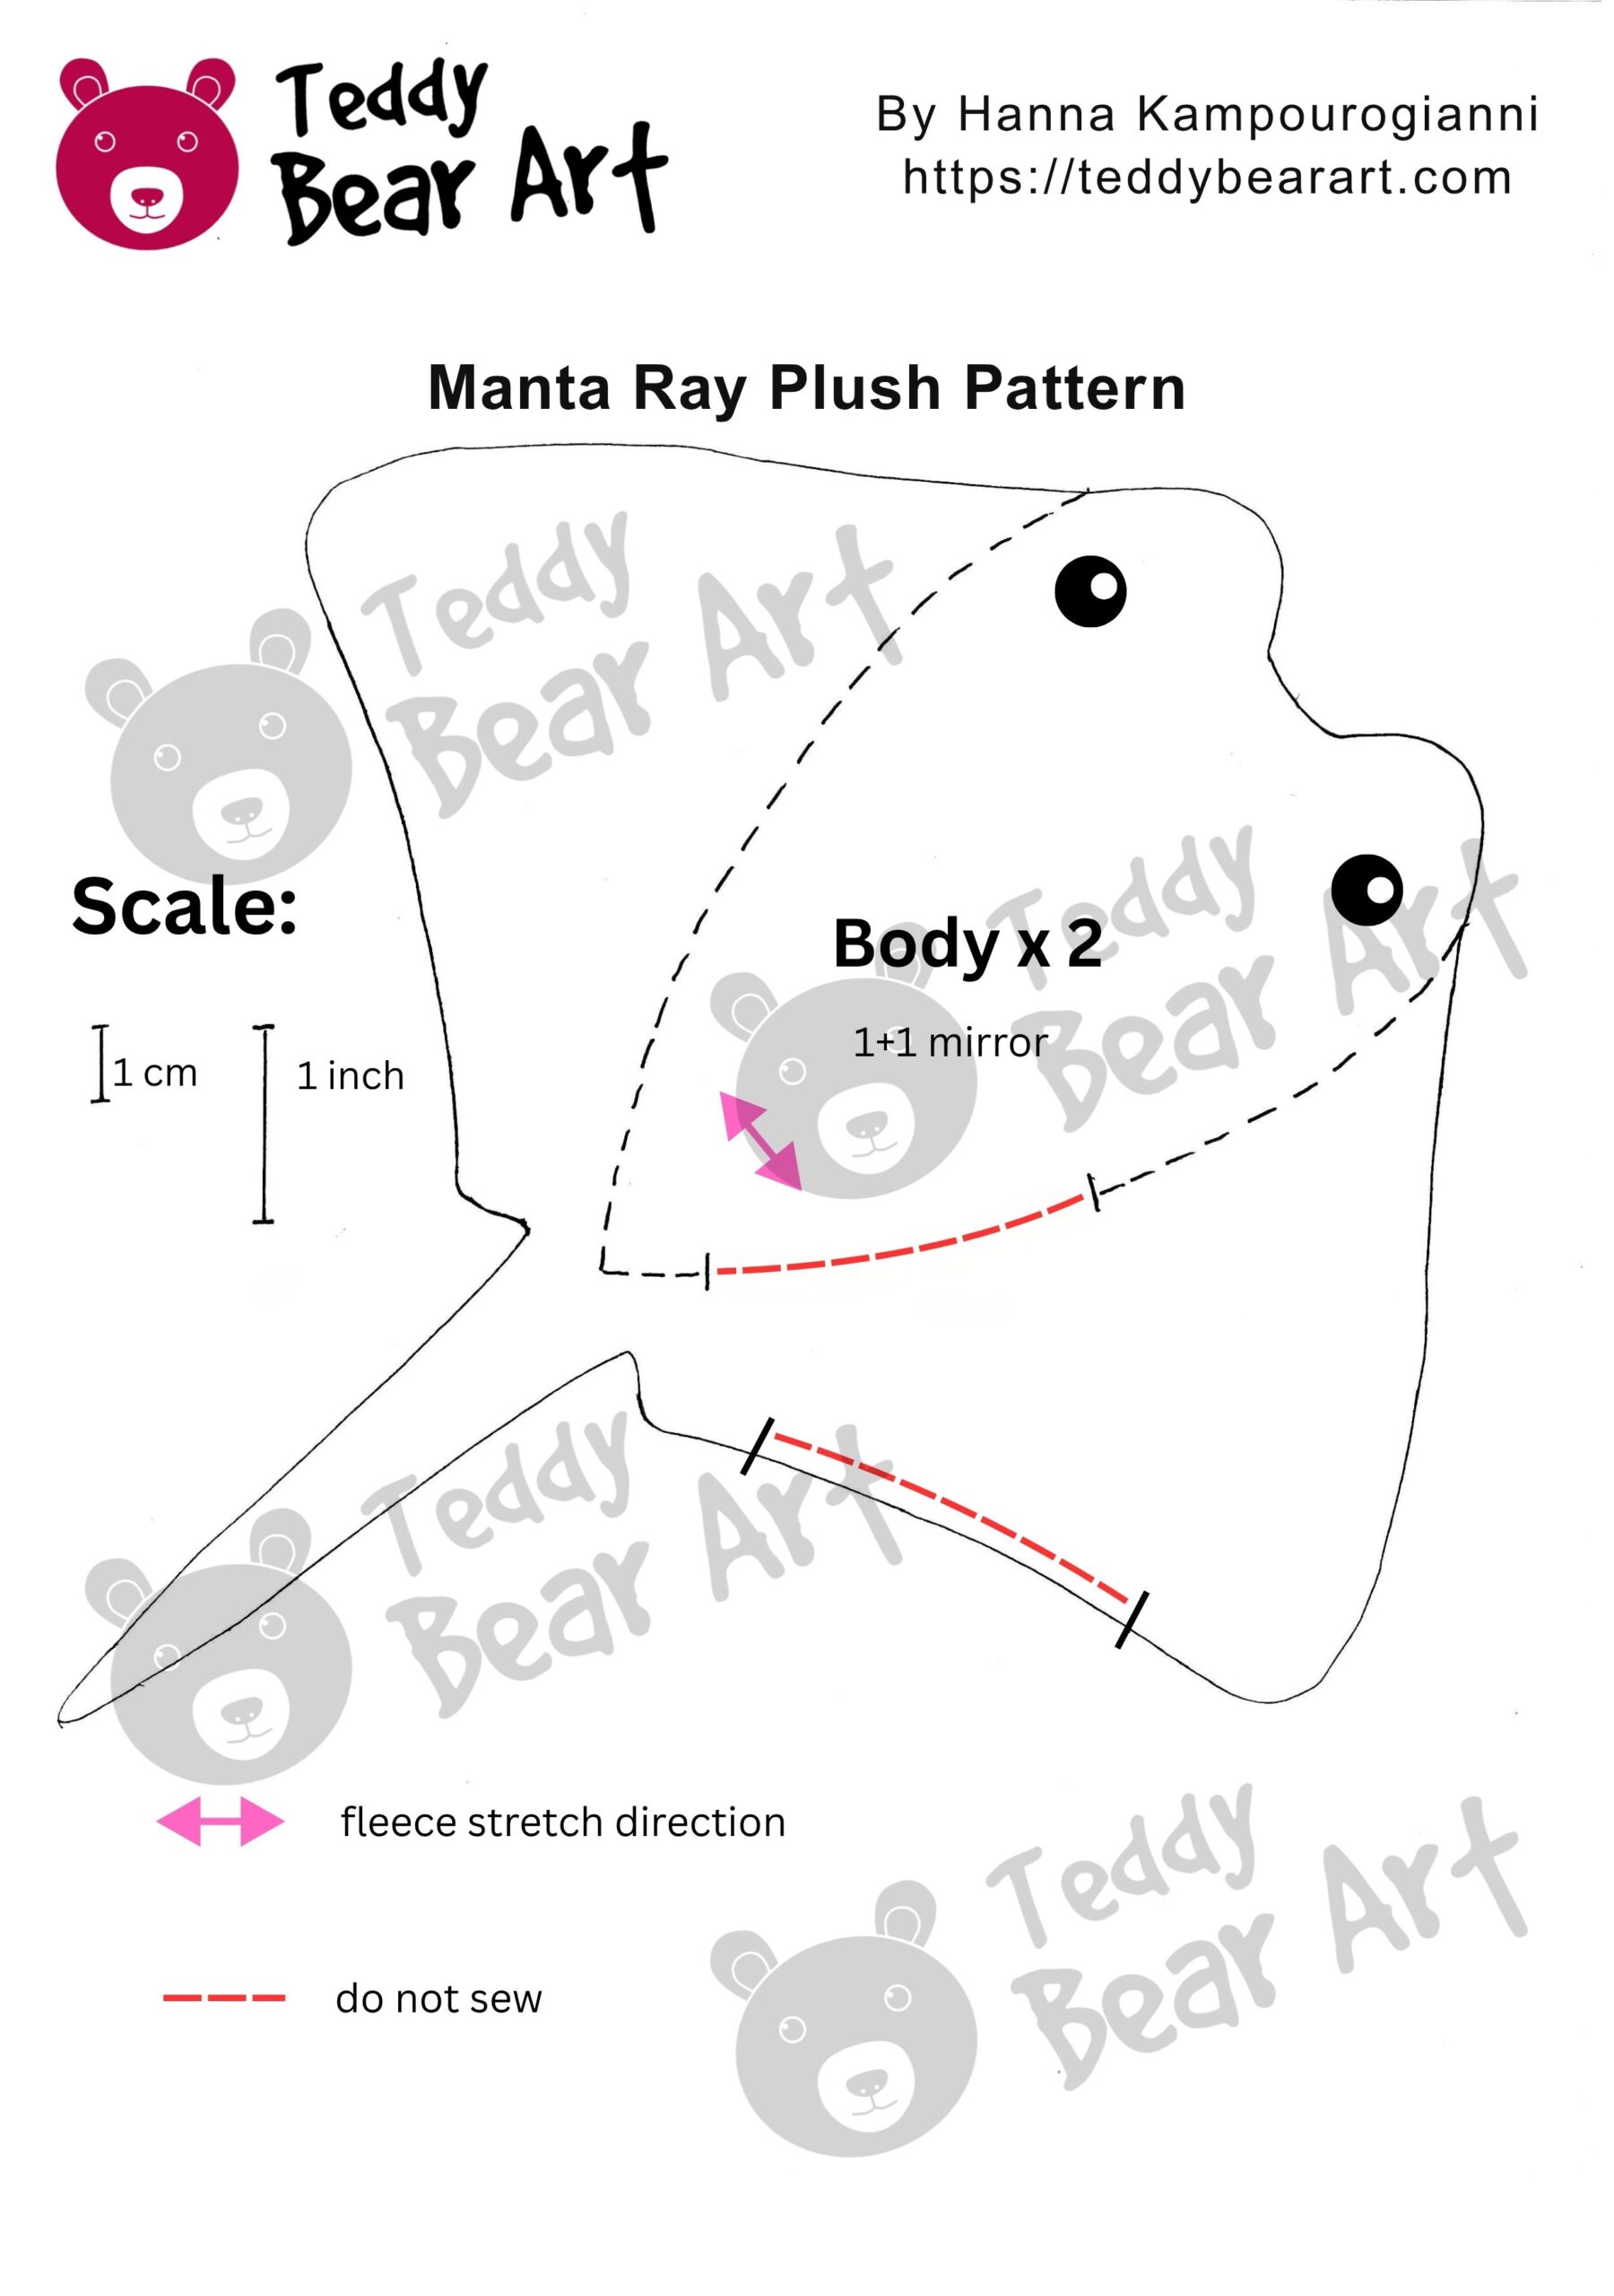
Download the Pattern
Notice that seam allowances are not included. For this project, it is fine to include 5 mm for seam allowances.
To download the pattern, follow the instructions below:
From a phone or tablet: There should be a similar option for mobile devices with Android or iOS. Click on the image. Save it by holding your finger on the image and selecting the “Save Image” option. Then, go to your photo gallery and print it (an option available).
From a computer: Click on the photo of the pattern you see below. In the new tab that will open, you press the right mouse button and select the “Save image as …” option. Then, you choose where the image will be saved on your computer.
Materials You Will Need
- Fleece fabric for the back of the manta ray
- Fleece fabric for the belly
- Polyester stuffing
- Matching sewing thread
- Needle or sewing machine
- Pins or sewing clips
- Scissors
- Disappearing fabric marker or pencil
- Beads, felt, embroidery thread, or glass eyes for the eyes
How to Sew a Manta Ray Plush Step by Step
Step 1: Cut Out the Manta Ray Pieces
Print the pattern and cut out the paper template.
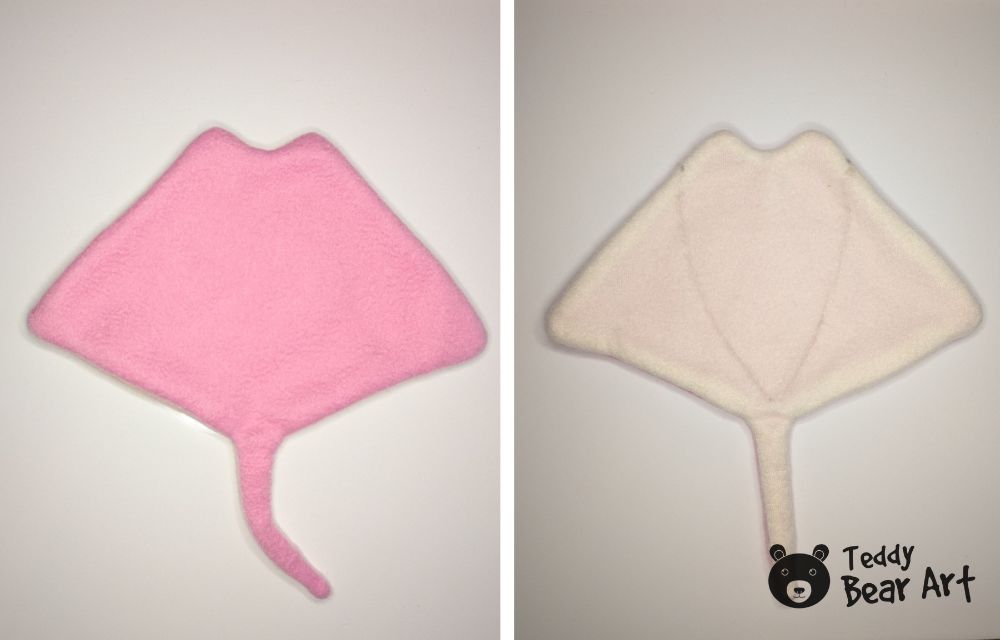
I used pink fleece for the back and white fleece for the belly. Usually we place the pattern on the wrong side of the fabric, but I like both sides of the fleece. So I placed it to the right side. You can choose which side you like more, trace around it, and cut out both pieces carefully.
Do not forget to add seam allowance when cutting. About 5 mm is enough for this fleece plush.
Cut slowly around the fins and tail. These parts create the manta ray shape, so neat cutting helps the finished plush look cleaner.

Step 2: Sew the Back and Belly Together
Place the back piece and the belly piece right sides together.
Pin or clip the pieces around the edges so they do not shift while sewing.
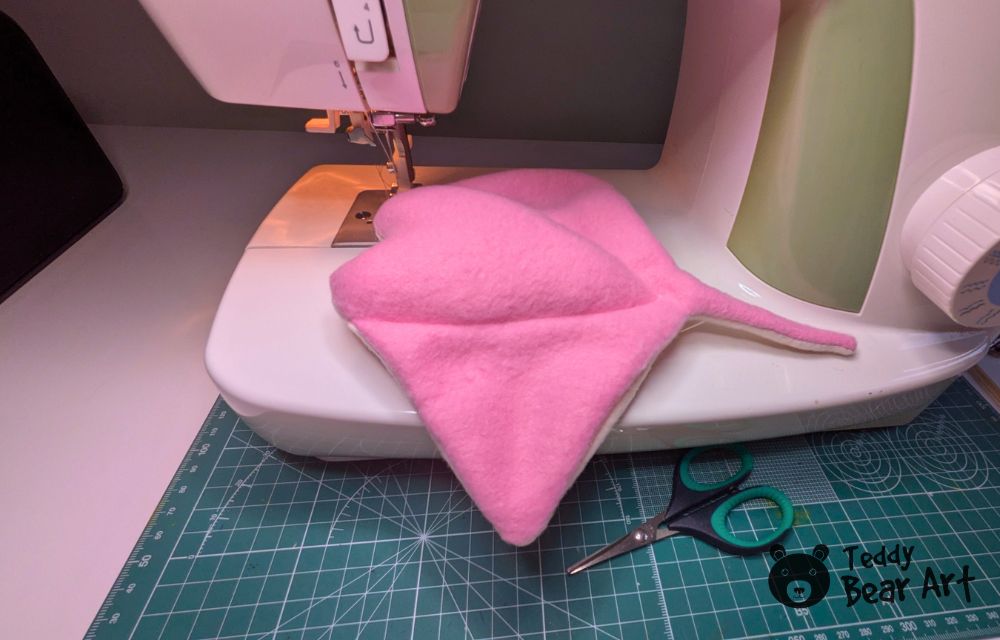
Sew around the full outer contour of the manta ray, but leave one opening for turning the plush right side out. I left the opening on one of the fins because this area is easier to close later with a ladder stitch.
Sew slowly around the tail and corners. The tail is narrow, so it is better to take your time here.
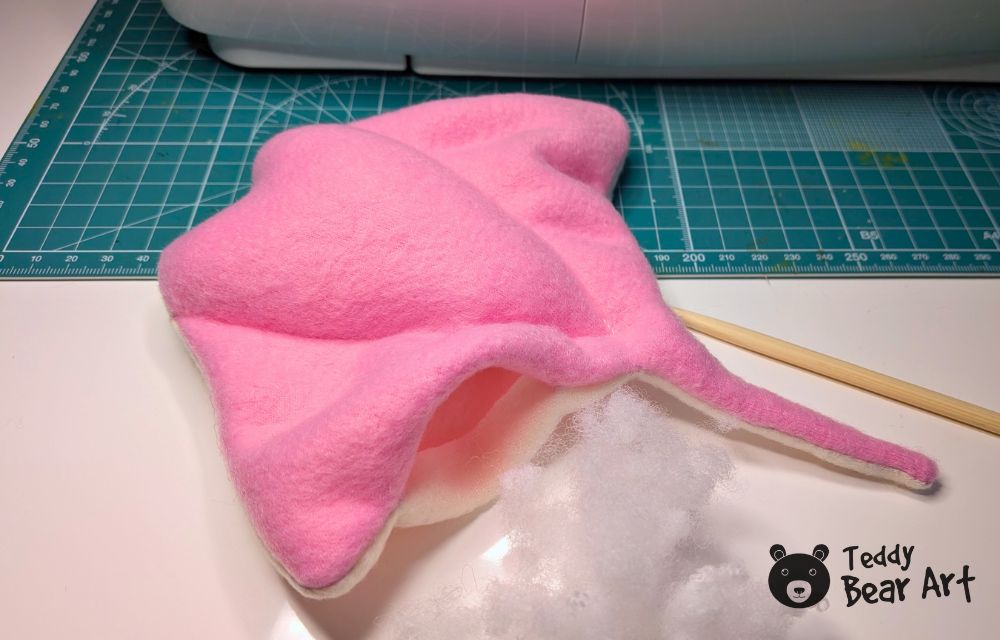
Step 3: Turn the Plush Right Side Out
Turn the manta ray right side out through the opening.
Gently push out the tail, corners, and fin tips. You can use a blunt wooden stick to help shape the narrow areas.
Take your time with this step. The manta ray looks much better when the fins and tail are carefully straightened before stuffing.
After turning, smooth the seams with your hands.
Step 4: Mark the Belly Lines
Place the manta ray belly side up.
Draw two curved lines on the white belly piece. These lines create the soft raised belly shape and help the plush look more like a manta ray.
The best option is to use a disappearing fabric marker. I used a pencil only for the tutorial photos because I wanted the lines to be clearly visible.
If you use a pencil, do not press too hard. For a clean finish, a disappearing marker is much better.
Step 5: Sew the First Belly Line
Sew along the first marked belly line from beginning to end.
You can sew this line on a sewing machine or by hand. If you sew by hand, use small neat stitches and follow the curve slowly.
This first line begins to shape the belly and separates the center area from one side of the plush.
Step 6: Sew the Second Belly Line and Leave an Opening
Now sew along the second marked belly line.
This time, do not sew the whole line completely. Leave a small opening on this line for stuffing the manta ray.
The opening should be large enough to add stuffing, but not too large. A small neat opening will be easier to close later.

Step 7: Stuff the Manta Ray Plush
Add polyester stuffing through the opening you left on the second belly line.
Use small pieces of stuffing instead of one large clump.
Do not overstuff the plush. A manta ray should stay soft and slightly flat, not round like a ball.
The middle can be a little fuller, but the fins should stay light and gentle. Do not stuff them. This gives the plush a nice wing-like shape.
Step 8: Close the Stuffing Opening on the Body
When you are happy with the shape, close the small stuffing opening on the belly line.
Use a needle and matching thread. Sew the opening closed with small neat stitches so it blends into the belly line.
After closing it, gently shape the plush with your hands and spread the stuffing evenly if needed.
Step 9: Close the Turning Opening on the Fin
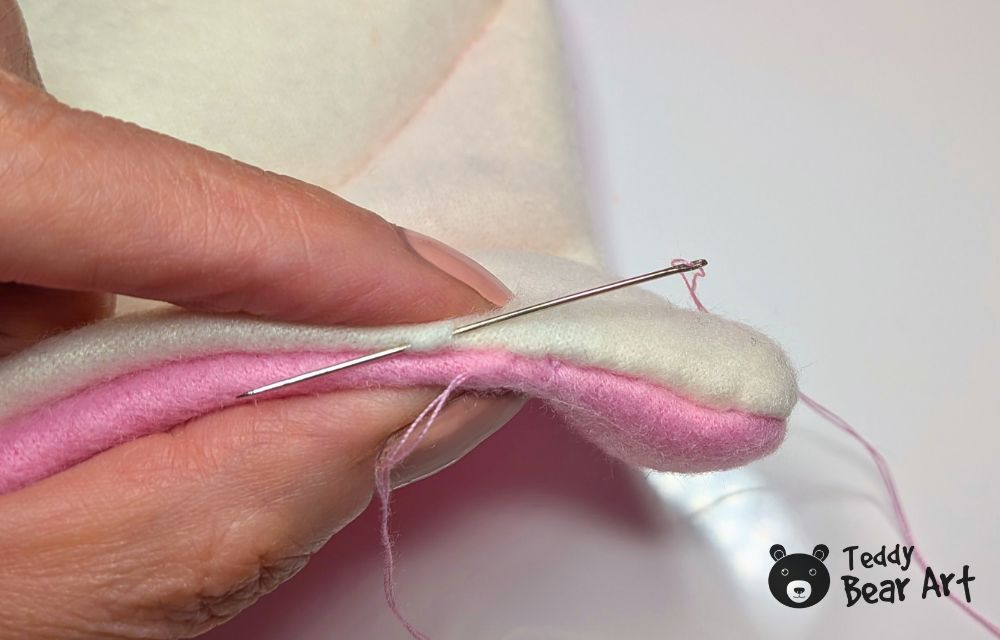
Now close the opening that you left on the fin for turning the plush.
Fold the raw edges inside and close the gap with a ladder stitch. Make small even stitches, pulling the thread gently as you go.
This will make the opening almost invisible.
Step 10: Add the Eyes
Now add the eyes.
You can use beads, embroidered eyes, felt eyes, or glass eyes. I used glass eyes for my manta ray, but only use glass eyes if the plush is not intended for children.
Before attaching the eyes permanently, try a few different positions. A tiny change can make the manta ray look sweeter, funnier, or more curious.
Once you like the placement, sew or attach the eyes securely.
Your fleece manta ray plush is finished.
Tips for Sewing This Manta Ray
Fleece is a good fabric for this project because it is soft, forgiving, and easy to handle. It also does not fray like many woven fabrics, which makes it more comfortable for beginners.
Use sharp scissors when cutting the fleece. The fins are large and visible, so smooth edges make the finished plush look better.
Do not stretch the fleece while sewing. Let the fabric move naturally under the sewing machine, or hold it gently if you are sewing by hand.
Use enough pins or clips around the tail and fin corners. These areas can shift while sewing, especially because fleece is soft.
Mark the belly lines before sewing them. Do not try to sew them without a guide, because the curves help create the final shape.
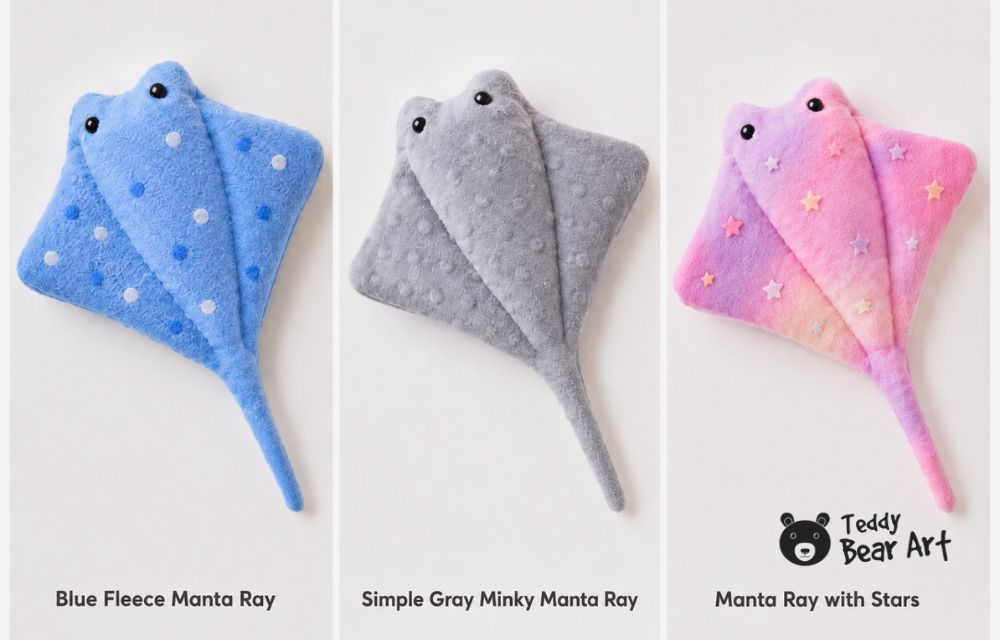
You can also make this plush in different colors. Pink and white make a cute fantasy manta ray. Gray and white look more natural. Blue and cream can give it a soft ocean style.

Easy Variations for Your Manta Ray Plush
Once you make one manta ray, it is easy to imagine other versions.
You can make a larger manta ray and turn it into a small pillow. For this, enlarge the pattern before printing and use extra soft fleece or minky fabric.
You can make a tiny manta ray from felt, but keep in mind that smaller pieces are usually harder to turn and stuff neatly.
You can also decorate the back with small embroidered stars, dots, or simple stitches. A fantasy manta ray would look very cute with pastel colors and tiny felt cheeks.
For a more natural sea animal plush, use gray fleece for the back and white or cream fleece for the belly. Keep the face very simple with only two black eyes.
This manta ray plushie tutorial is a nice project when you want something quick, soft, and different from the usual teddy bear or bunny. The shape is simple, but the finished toy still has personality.
Frequently Asked Questions
Is this manta ray plush good for beginners?
Yes, this manta ray plush is beginner-friendly. It uses only two main fabric pieces, and the shape is simple.
Can I sew this manta ray plush by hand?
Yes, you can sew it by hand. Use small backstitches for the main seams and small neat stitches for the belly lines. Close the fin opening with a ladder stitch.
What fabric is best for this manta ray pattern?
Fleece is the best choice for beginners because it is soft, easy to sew, and does not fray much. Minky can also work.
Before You Go
I really like this little manta ray because it is simple but not boring. The pattern is easy, the sewing process is relaxing, and the finished plush has such a gentle ocean-animal look.
If you enjoy making sea animal plushies, you may also like my hammerhead shark plush tutorial or my easy shark plush pattern. They are both simple fleece projects and work nicely as part of a handmade ocean collection.
Get Free Patterns & Be the First to Know!
Want free teddy bear patterns, exclusive tutorials, and a chance to win craft supplies?
Sign up for our newsletter using the subscribe form in the middle of this article to receive new patterns, insider tips, and the latest news on teddy bear art. You’ll also automatically be entered into our annual giveaway for a chance to win teddy bear crafting materials.
Bonus entry: Save one of our pins on Pinterest to increase your chances of winning!
Let’s create, inspire, and craft beautiful teddy bears together!