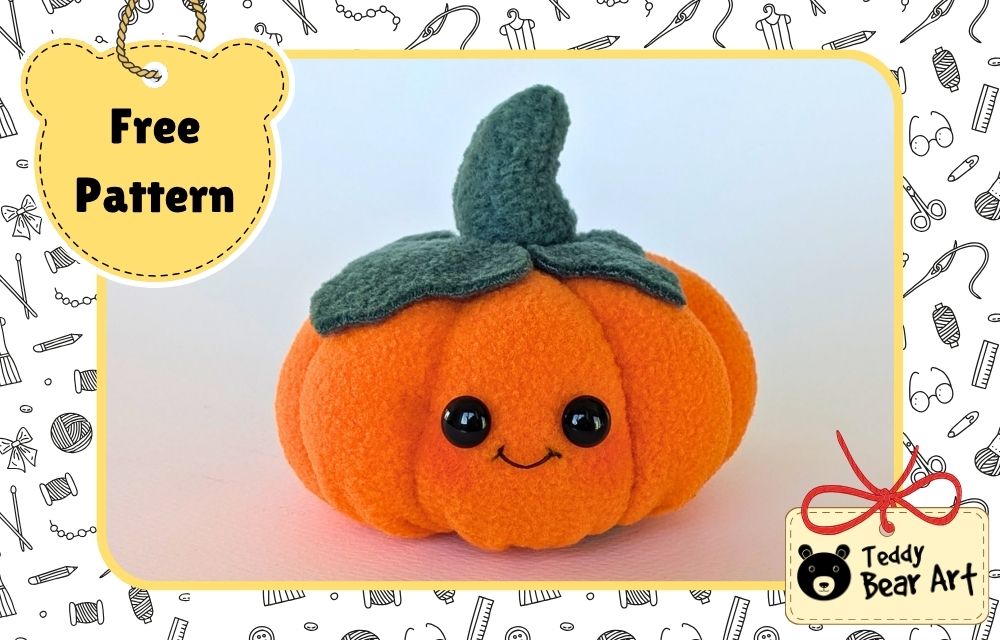
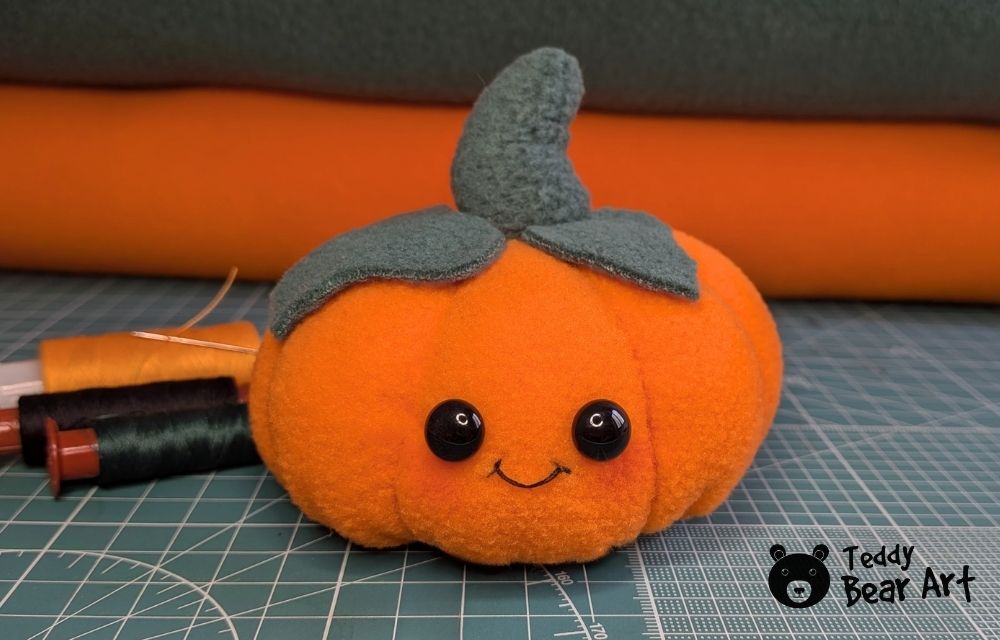
This pumpkin plush sewing pattern for beginners is a sweet little fleece project you can make for fall decor, Halloween crafts, or just because you love cute handmade plushies. I made this pumpkin from soft orange fleece, added a green stem and leaf, and finished it with shiny black eyes and a tiny smiling face.
I wanted this project to feel simple, soft, and friendly. Not a serious fabric pumpkin for a shelf, but a small pumpkin plush with personality. It is round, squishy, and cute enough to sit next to teddy bears, Halloween plush toys, or autumn decorations.
This tutorial includes a free printable pattern and step-by-step photos, so you can follow the process without guessing too much.
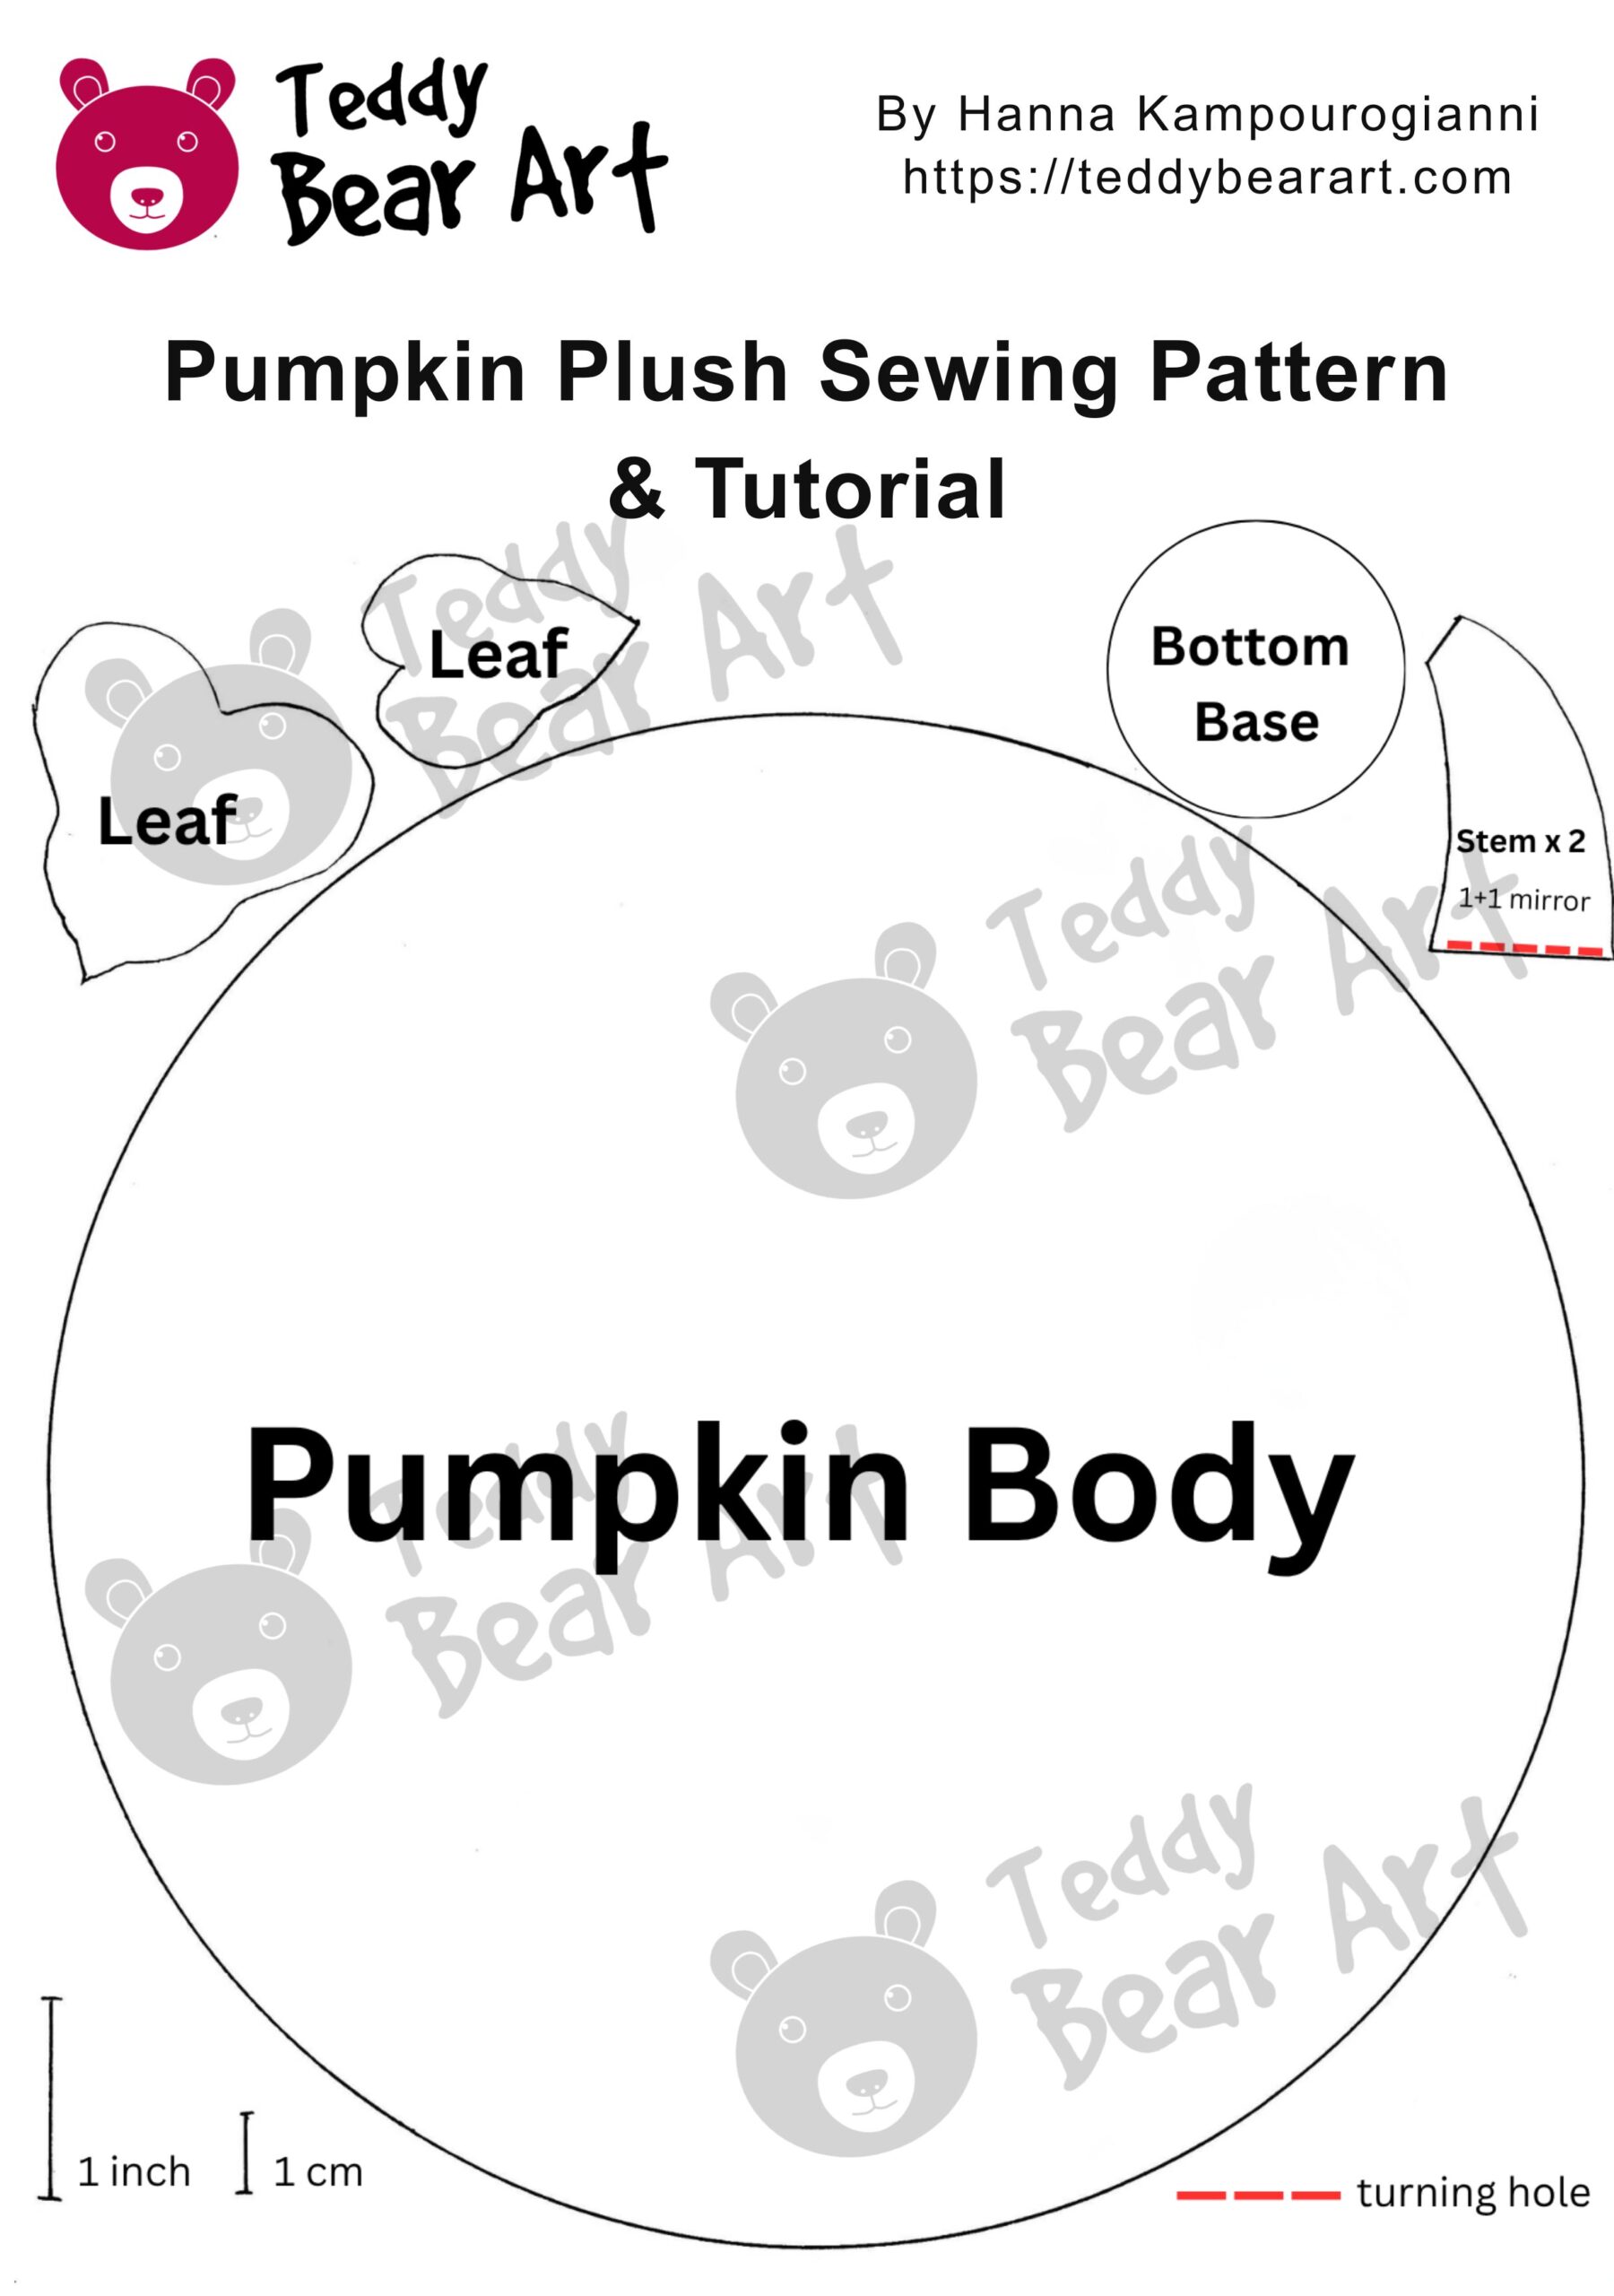
Download The Pattern
Notice that seam allowances are not included. For this project, it is fine to include 5 mm for seam allowances. The seam allowances for the bottom base and leaves are already included, so you can cut those pieces directly along the pattern line.
To download the pattern, follow the instructions below:
From a phone or tablet: There should be a similar option for mobile devices with Android or iOS. Click on the image. Save it by holding your finger on the image and selecting the “Save Image” option. Then, go to your photo gallery and print it (an option available).
From a computer: Click on the photo of the pattern you see below. In the new tab that will open, you press the right mouse button and select the “Save image as …” option. Then, you choose where the image will be saved on your computer.
Materials and Tools
- Orange and green fleece
- Polyester fiberfill
- Strong thread for gathering and shaping
- Needle
- Scissors
- Black beads or glass eyes
- Optional: glue, soft pastels, or textile paint for gentle shading
How to Sew a Pumpkin Plush
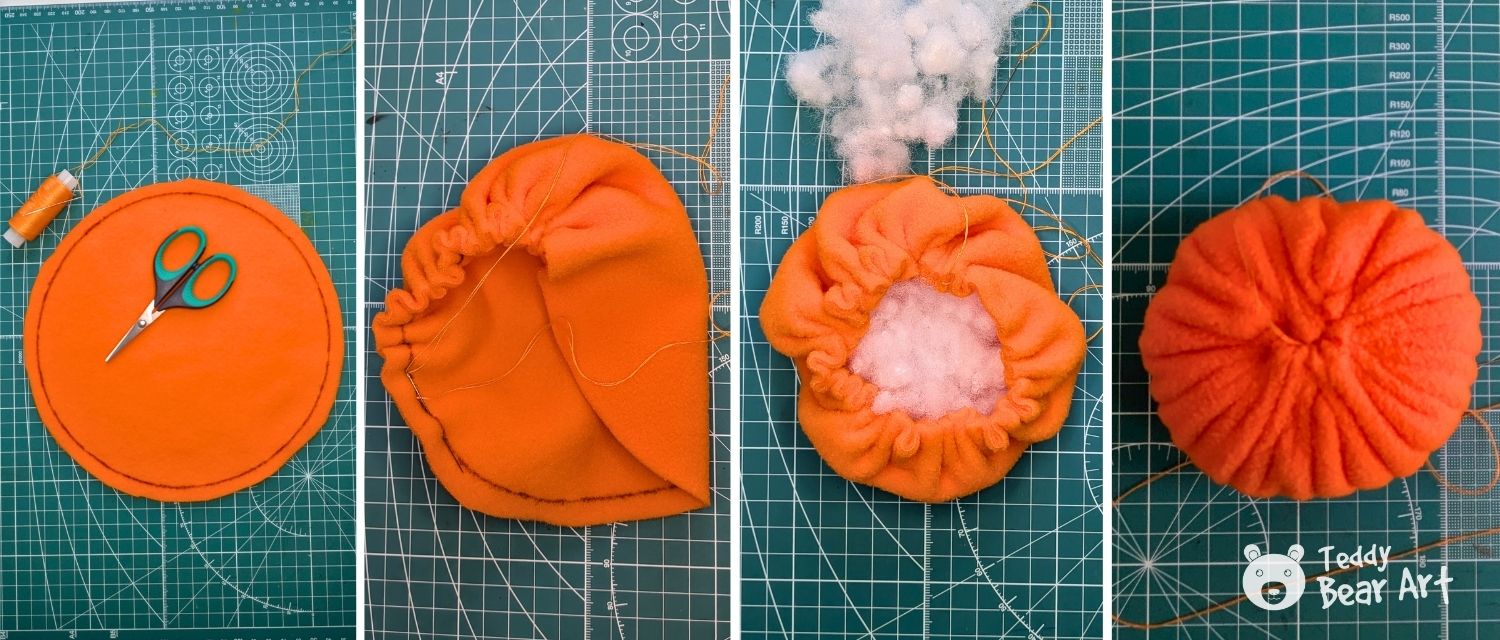
Start with the large orange circle. Sew a running stitch around the edge of the circle. Keep the stitches fairly even, but do not worry about making them tiny.
After you sew all the way around the circle, gently pull the thread. The fleece will start to gather and form a soft bowl shape.
Add stuffing inside the pumpkin. I like to add it little by little, because it is easier to control the shape. Do not make it too hard at once. The pumpkin should feel full, but still soft enough to pull into sections.
When the pumpkin is stuffed, pull the thread tighter to close the opening. Secure the thread well with several knots.
Now you have the basic round pumpkin shape.
Shape the Pumpkin Sections
The pumpkin sections are made with thread by pulling it symmetrically around the pumpkin. Secure the thread at the end of this process.
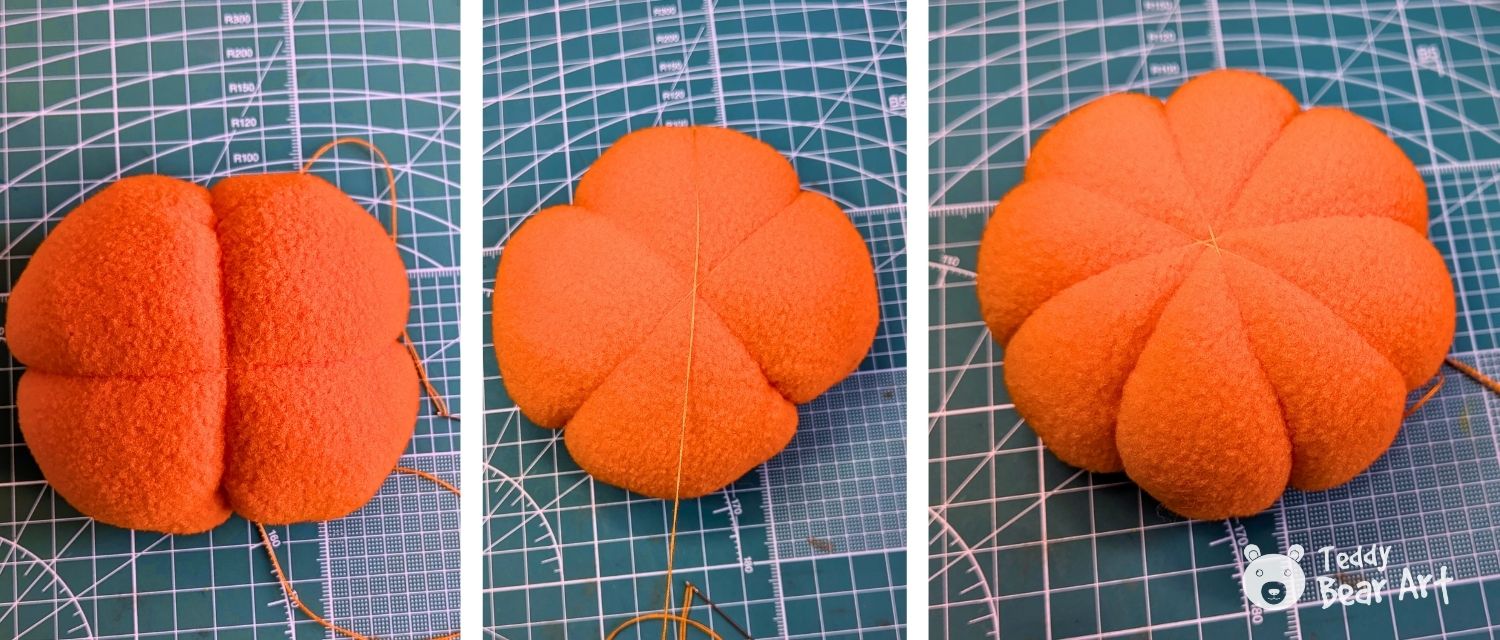
Add the Bottom Base
After shaping the pumpkin, you will see the gathered center on the bottom. To cover it, cut out the small circle (bottom base) from green or orange fleece and glue it to the bottom of the pumpkin.

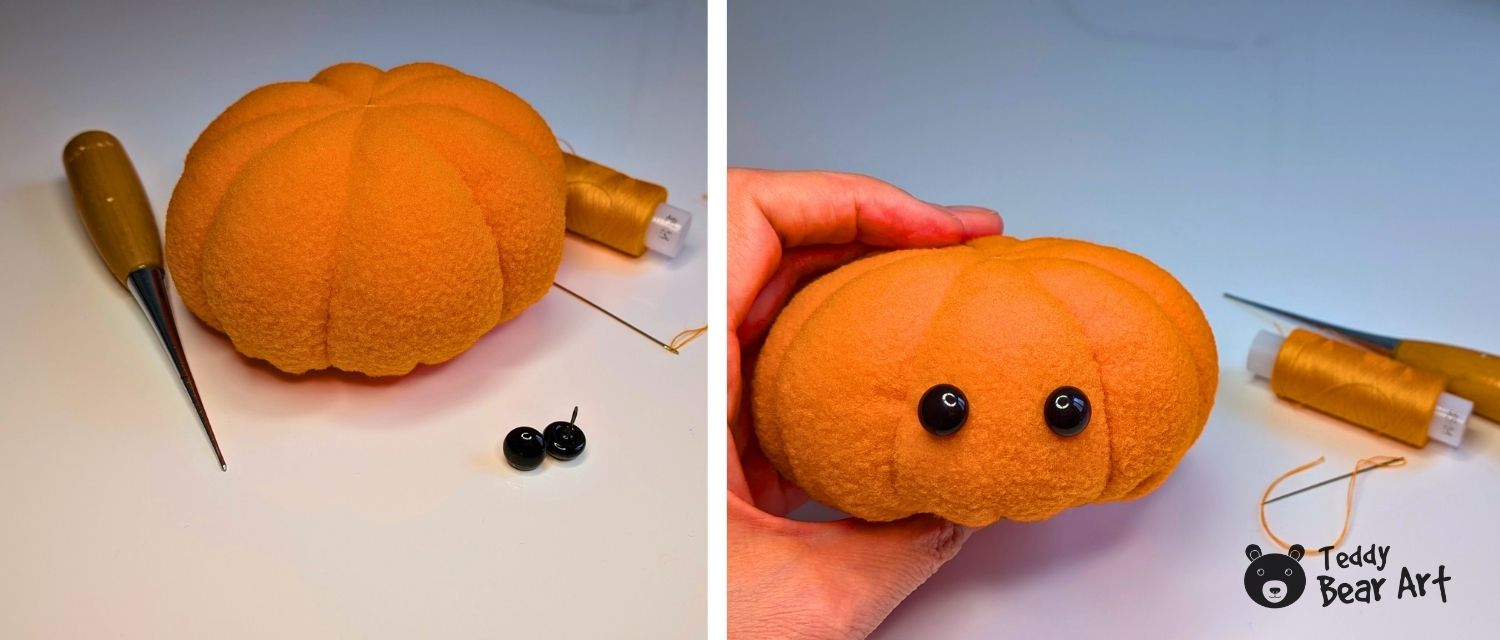
Add the Eyes
Now the pumpkin starts to get its personality.
Place the black beads or glass eyes on the front of the pumpkin before attaching them.
For a sweet expression, keep the eyes quite low and close enough together. If the eyes are too high, the pumpkin can look less soft and friendly.
Once you like the placement, secure the eyes, and secure the thread on the top.
If this plush will be used only for decoration, beads or glass eyes are fine. If it is for a child, use safe, child-friendly materials instead.
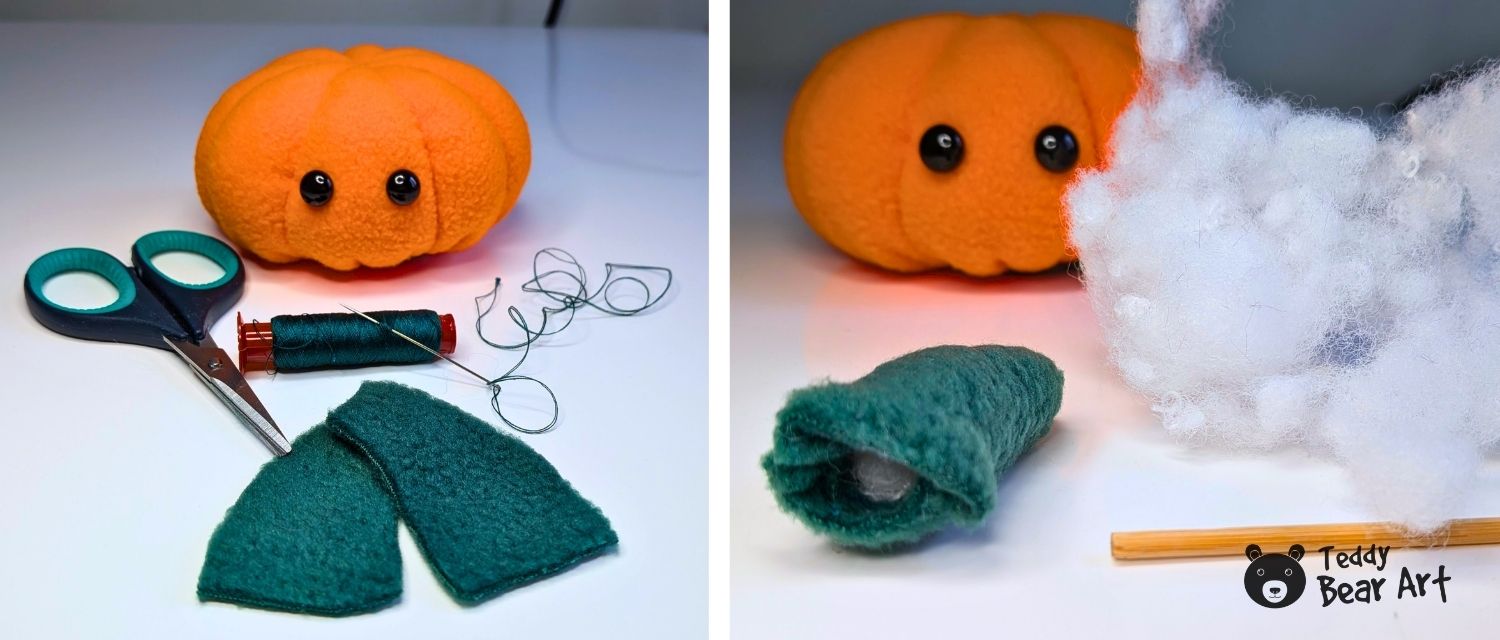
Make the Stem and Leaves
For the stem, sew the two stem pieces together, leaving a small opening. Turn it right side out and add a little stuffing. Tie the base of the stem with a thread and secure it.
Cut the leaves from green fleece or felt.
Attach the Stem and Leaf
Place the stem at the top center of the pumpkin. Sew it on firmly with green thread. You can pass the needle through the pumpkin body to make the stem more stable.
Glue the leaves next to the stem.
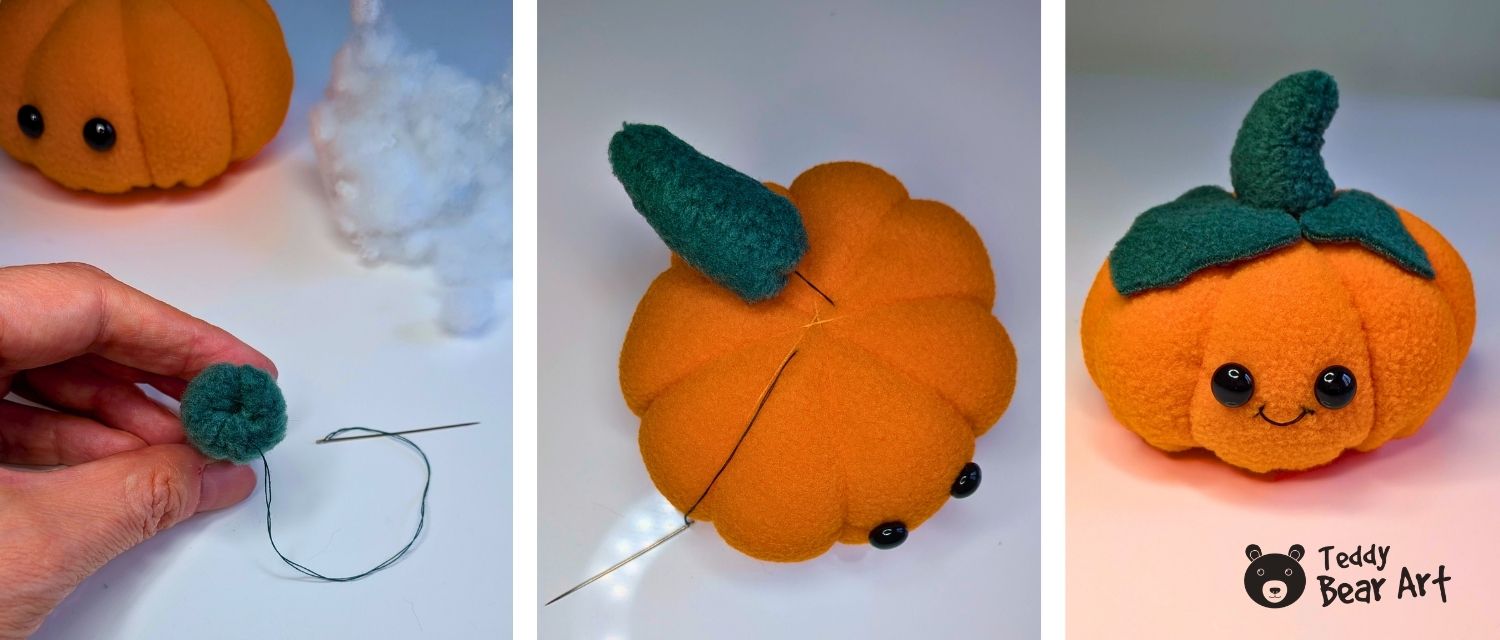
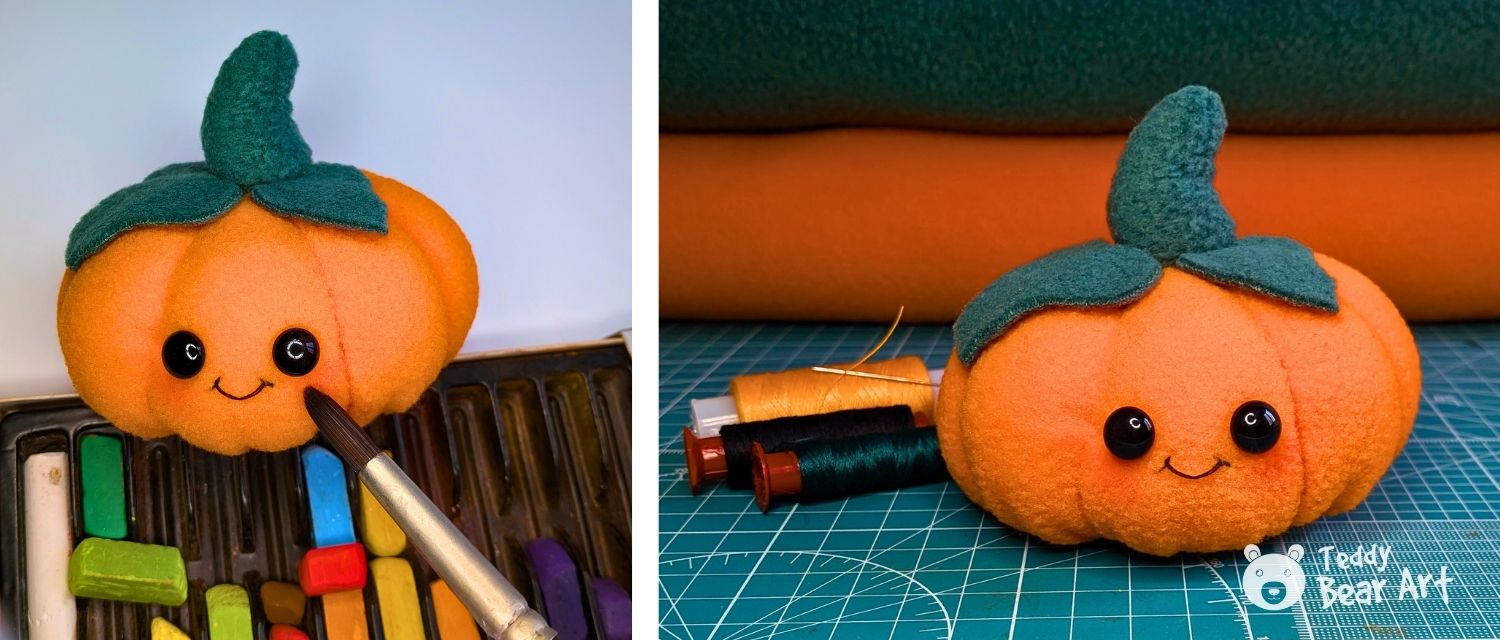
Add the Smile and Final Details
Use black embroidery thread to stitch a small smile under the eyes. Keep it simple. A tiny curved mouth is enough to make the pumpkin look happy.
You can also add very soft shading to the cheeks or pumpkin grooves.
This little detail makes the face warmer and gives the pumpkin a finished plush-toy look.
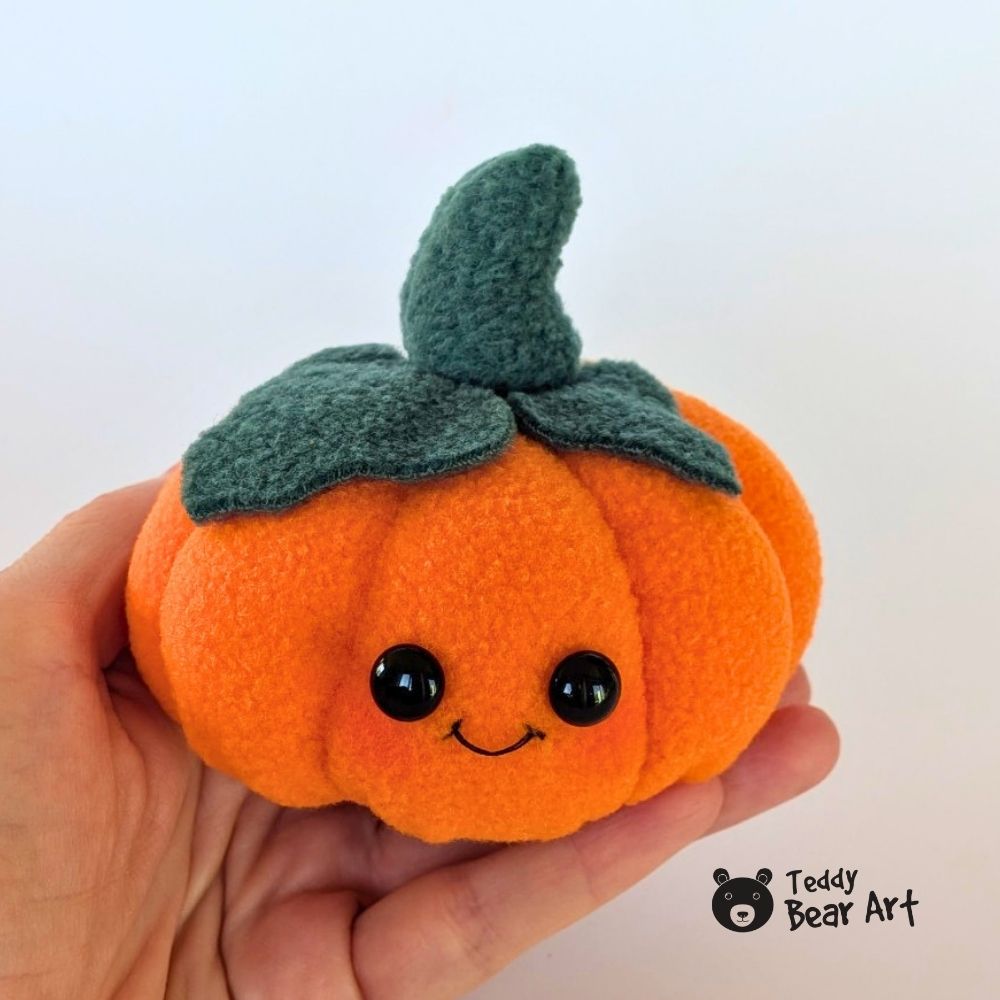
And here is the finished pumpkin plush. It is small, soft, and easy to hold in your hand. I love how the simple round shape turns into a cute character just by adding eyes and a little smile.
You can make one pumpkin or sew a whole group in different sizes. A few small fleece pumpkins would look adorable on a craft table, shelf, Halloween display, or next to handmade teddy bears.
Pumpkin Plush Ideas and Variations
This easy fleece pumpkin tutorial can be changed in many ways.
You can make a classic orange pumpkin, a white ghost-style pumpkin, a black Halloween pumpkin, or a pastel pumpkin for softer fall decor.
You can also skip the face and make a simple stuffed pumpkin for autumn decorating. But if you love cute plushies, I really recommend adding the eyes and smile. It instantly turns the pumpkin into a little character.
For Halloween, you can place this pumpkin next to a bat plush, ghost plush, or black cat toy. It also works nicely as a photo prop for teddy bears and other handmade animals.
FAQ
What fabric is best for this pumpkin plush?
Fleece is a great choice because it is soft, warm, and easy to shape. Minky also works well.
Is this a Halloween sewing project?
Yes, this pumpkin works very well for Halloween, but it is also nice for fall and Thanksgiving decor.
Can I make this pumpkin plush in different sizes?
Yes, you can make this pumpkin plush larger or smaller by resizing the pattern before printing. Just remember that a very small pumpkin may be harder to stuff and shape neatly, so beginners may find a medium-sized or large-sized pumpkin easier to sew.
Before You Go
This free pumpkin plush sewing pattern for beginners is quick, soft, and fun to make. It does not need complicated pattern pieces or advanced sewing skills, but the finished pumpkin still looks charming and full of character.
If you enjoy cute fleece projects, this little pumpkin is a lovely seasonal make. Sew one for your desk, your shelf, your Halloween display, or as a tiny handmade friend for your teddy bears.
Love cute Halloween plushies? You may also like these 5 free bat patterns to sew:
Get Free Patterns & Be the First to Know!
Want free teddy bear patterns, exclusive tutorials, and a chance to win craft supplies?
Sign up for our newsletter using the subscribe form in the middle of this article to receive new patterns, insider tips, and the latest news on teddy bear art. You’ll also automatically be entered into our annual giveaway for a chance to win teddy bear crafting materials.
Bonus entry: Save one of our pins on Pinterest to increase your chances of winning!
Let’s create, inspire, and craft beautiful teddy bears together!