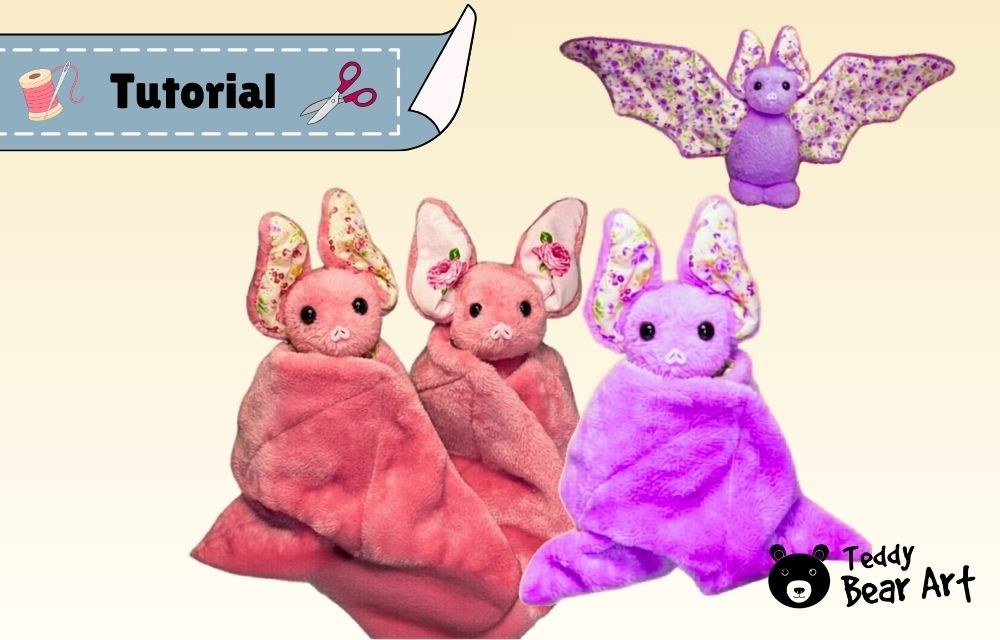
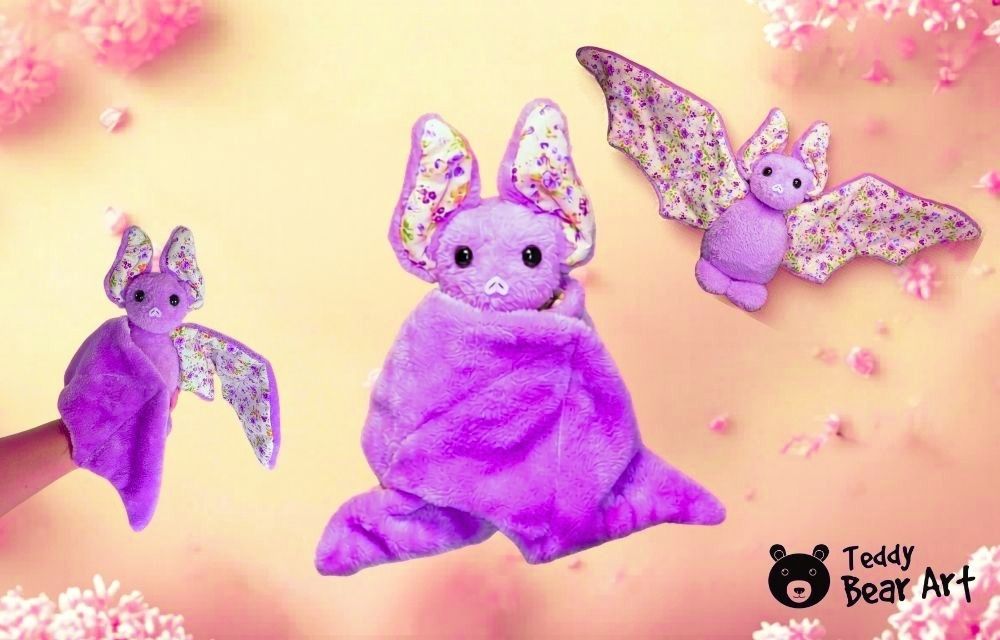
Learning how to sew a bat plush might seem complicated at first because of the wings and shape, but it’s actually much easier than it looks. With soft fabric and a few simple steps, this beginner-friendly project can be finished in just one evening.
Grab the free bat plush pattern and follow along with the instructions below.
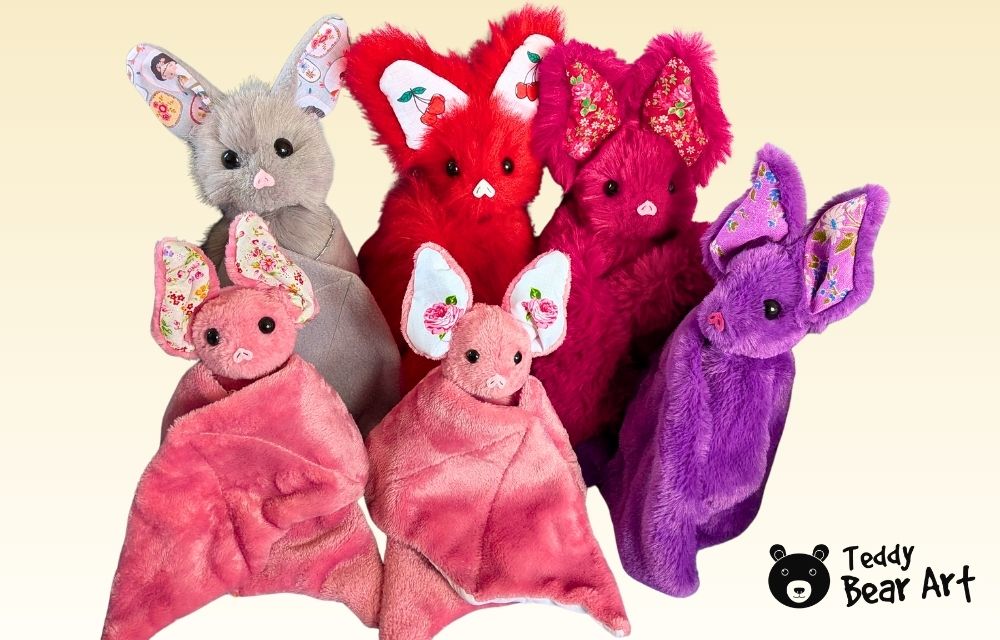
In this tutorial, I used a few different fabric versions of the same bat plush pattern to show the steps more clearly.
Materials
- Minky fabric
- Contrasting cotton for the inner ears and wings
- Polyester stuffing
- Matching thread
- Sewing needle and/or sewing machine
- Scissors
- Pins or clips
- Glass or bead eyes approximately 10-12 mm in diameter
- A piece of fleece or felt fabric for the nose
- Optional joint for the head
Sewing the Bat Plush
Place your pattern pieces on the fabric and cut them carefully. Don’t forget to leave for seam allowances.
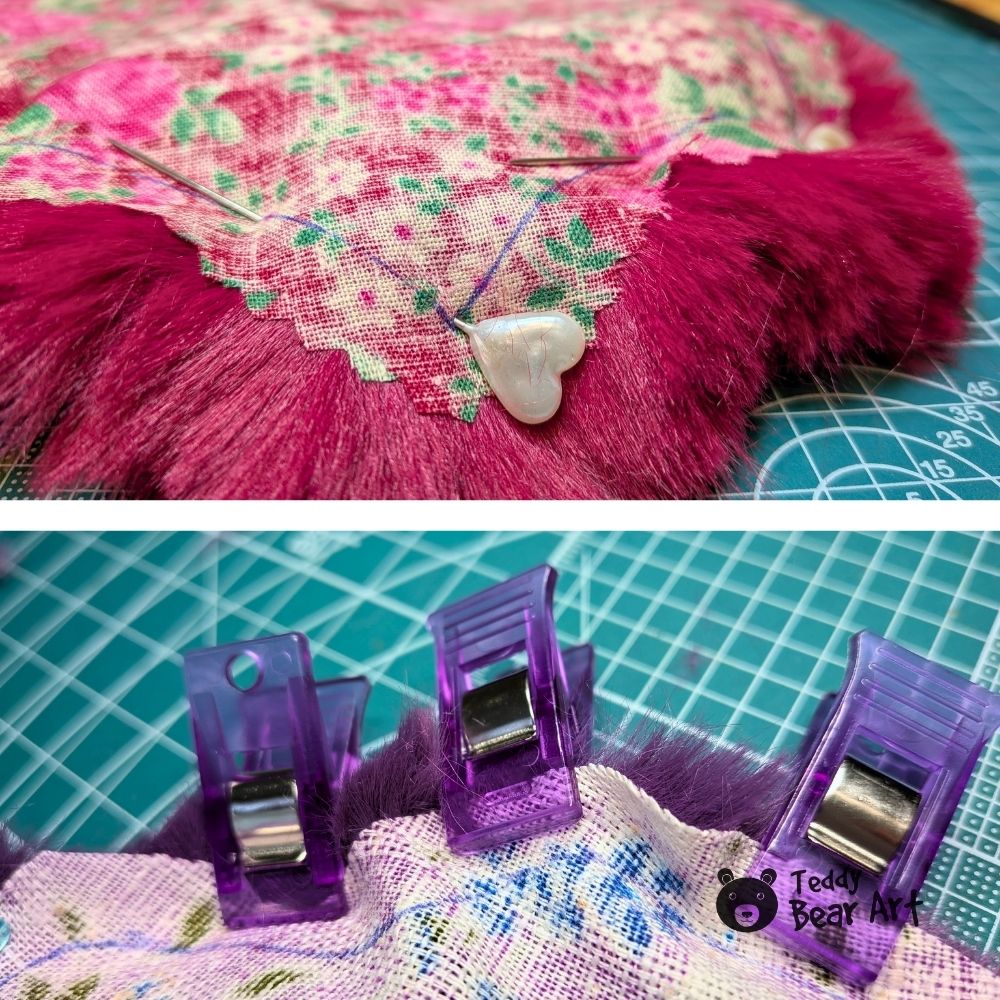
Sew the wing pieces together, using minky and cotton, then turn them right side out. Carefully smooth them out with a blunt wooden stick. If the cotton looks wrinkled, you can gently press it with an iron on a low setting.
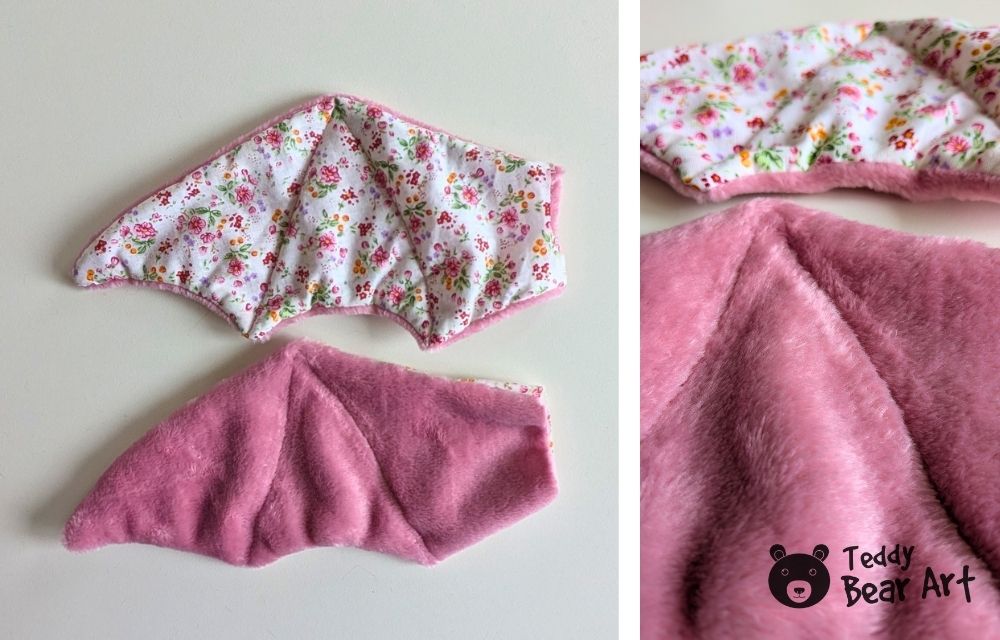
Next, sew two lines to define the bat wing membranes. If you have a disappearing fabric marker, use it to mark the stitching lines first for a cleaner result
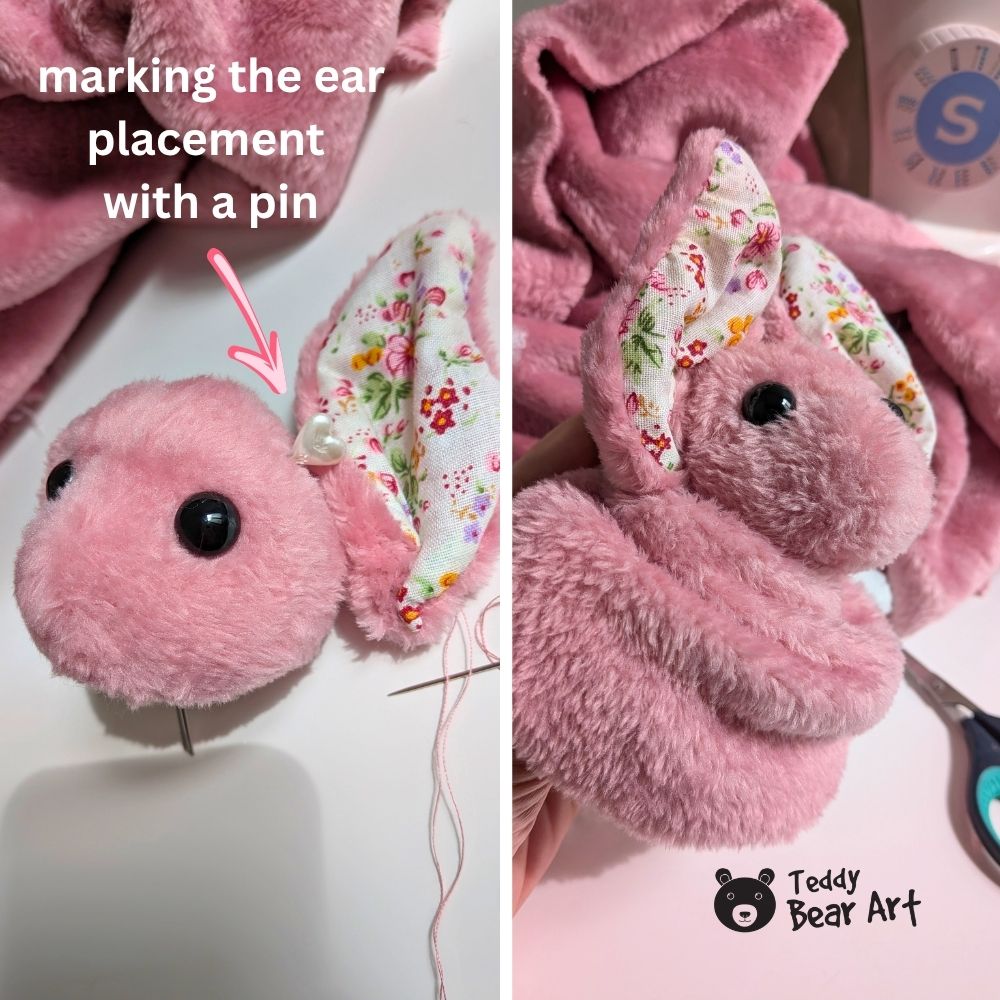
Now let’s make the head. Turn the sewn head right side out and stuff it with fiberfill. You can skip this step if you plan to sew the head directly to the body.
I wanted the head to be movable, so I inserted a disc and cotter pin, using a teddy bear technique, and then closed the opening tightly.

If you are not making a movable head, fill the body with stuffing first, then sew the head securely onto it.
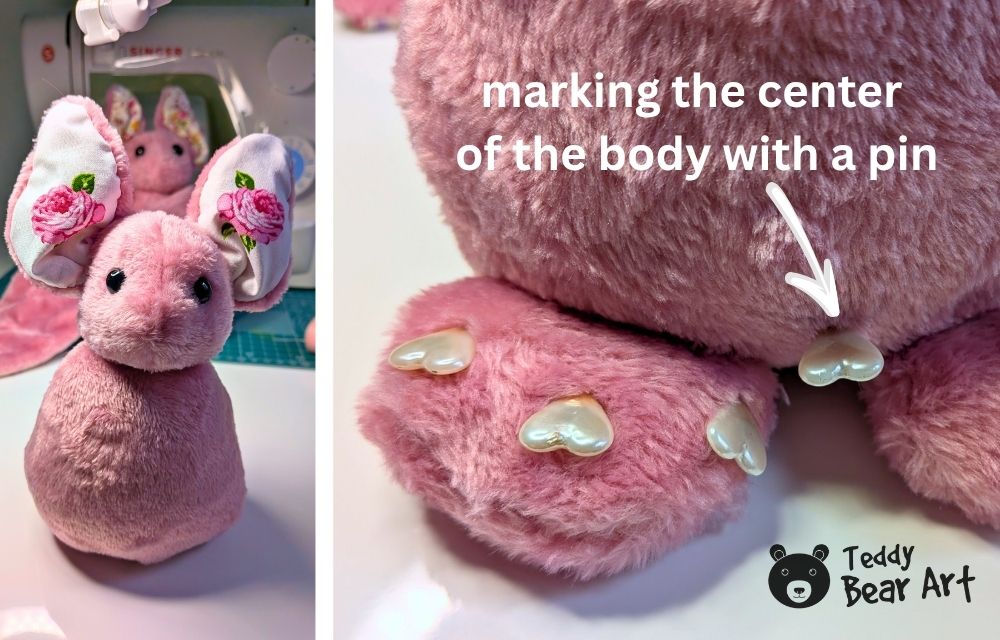
And the final step is the wings. Close the turning openings, then sew the wings onto the sides of the body, placing them precisely along the side seams. Attach them by hand using an invisible ladder stitch (watch my ladder stitch tutorial video for a clean finish).
FAQ
Can I sew this by hand?
Yes, this project works perfectly with hand sewing and is great practice.
Can I customize the bat?
Yes, you can change the fabric or add details to give it a unique look.
Before You Go
Now you know exactly how to sew a bat plush in a simple and beginner-friendly way. Once you make one, it becomes much easier to experiment with different fabrics, sizes, and styles.
If you enjoyed this project, save this page so you can come back to it later. It’s the kind of tutorial you’ll want to revisit when you feel like making something quick, cozy, and creative.
You may also like:
Get Free Patterns & Be the First to Know!
Want free teddy bear patterns, exclusive tutorials, and a chance to win craft supplies?
Sign up for our newsletter using the subscribe form in the middle of this article to receive new patterns, insider tips, and the latest news on teddy bear art. You’ll also automatically be entered into our annual giveaway for a chance to win teddy bear crafting materials.
Bonus entry: Save one of our pins on Pinterest to increase your chances of winning!
Let’s create, inspire, and craft beautiful teddy bears together!
I love this idea so much! Thank you for sharing it!
Also, quick question I might have missed it, but where can I actually find or download the pattern? Is it included somewhere in the article?
And about how long does it take to sew this bat from start to finish?
Thanks so much, I’m really glad you like it!
The pattern is linked within the article, but here it is again for convenience:
https://teddybearart.com/easy-bat-plush-pattern-free-sewing-template-are-you-seriously-not-making-this/
As for the time, it really depends on the person making it. If you already have basic sewing skills, it can be done quite quickly, even in one evening. If you’re a beginner or making it with kids, it might take a bit longer, but that’s part of the fun ????
I really enjoyed this tutorial! I’ve always liked arts and crafts projects, especially ones that are beginner-friendly and fun to make at home. The bat plush turned out adorable, and your instructions make the process feel much easier to understand. I appreciate how you explained everything clearly for people who may be new to sewing. I’ll definitely be following your tutorial when I try making one myself!
Thank you for your kind words! Happy that the tutorial is clear and easy to follow. Enjoy your sewing!